 Pin
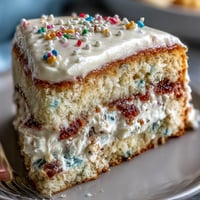
Pin These carrot cake truffles came into my life during a particularly stressful week when a friend texted asking if I could bring something special to a spring potluck. I had cream cheese and carrots on hand, and the idea hit me suddenly while I was making my morning coffee—what if I turned carrot cake into something you could eat with your fingers? An hour later, my kitchen smelled like cinnamon and butter, and I had these jewel-like little bites cooling on my counter that somehow tasted like comfort and celebration at once.
I'll never forget bringing those first batch to the potluck and watching them disappear within minutes. A coworker asked for the recipe right there, frosting-flecked fork still in hand, and I realized something had clicked. Now whenever spring rolls around or someone asks for a bring-along dessert, these are the first thing I make.
Ingredients
- Finely grated carrots (1 cup, 130 g): Fresh carrots give the truffles moisture and that genuine carrot cake flavor, so don't skip this for pre-shredded versions which can be watery and lack brightness.
- Crushed graham crackers or digestive biscuits (1 cup, 120 g): These create the cake-like crumb structure and bind everything together, giving the truffles that essential tender bite.
- Toasted walnuts or pecans (1/2 cup, 60 g): Toasting them first deepens their flavor dramatically and makes the truffles feel more sophisticated than you'd expect from something so simple.
- Full-fat cream cheese, softened (1/2 cup, 120 g): Softened at room temperature is non-negotiable here because cold cream cheese won't incorporate smoothly into the mixture and you'll end up with lumps.
- Granulated sugar (1/3 cup, 65 g): Just enough to add sweetness without making the centers overly sugary when paired with the cream cheese coating.
- Vanilla extract (1 tsp): A small amount that somehow makes every spice pop and feel more rounded.
- Ground cinnamon (1/2 tsp) and nutmeg (1/4 tsp): These warm spices are what make people say they taste like actual carrot cake, so measure them carefully and don't be tempted to double them.
- White chocolate, chopped (8 oz, 225 g): The silky coating that makes these feel fancy, though quality matters here because cheap white chocolate can taste waxy.
- Softened cream cheese (3 oz, 85 g) and butter (2 tbsp, 30 g) for coating: These two ingredients transform melted white chocolate into something luxuriously smooth that clings to each truffle instead of sliding off.
Tired of Takeout? 🥡
Get 10 meals you can make faster than delivery arrives. Seriously.
One email. No spam. Unsubscribe anytime.
Instructions
- Mix your truffle base:
- Combine the grated carrots, crushed biscuits, toasted nuts, softened cream cheese, sugar, vanilla, cinnamon, nutmeg, and salt in a large bowl. Stir until everything comes together into a sticky dough that holds together when you squeeze it.
- Roll into balls:
- Using a tablespoon or small scoop, portion out the mixture and roll each piece between your palms into smooth balls about the size of a large marble. This is meditative work, and you'll start to feel when the dough is perfectly compact.
- Chill for structure:
- Spread the balls on a parchment-lined tray and refrigerate for at least an hour until they're completely firm and won't fall apart when you touch them.
- Prepare your coating:
- Melt the chopped white chocolate gently over a double boiler or in short bursts in the microwave, stirring frequently to avoid scorching. Once smooth, remove from heat and whisk in the softened cream cheese and butter until you have a silky, glossy mixture.
- Dip with confidence:
- Using a fork or dipping tool, submerge each chilled truffle into the warm coating, twisting gently to ensure it's fully covered, then lift out and let excess drip back into the bowl. The cold truffle will set the coating almost instantly, which is exactly what you want.
- Garnish if desired:
- While the coating is still tacky, sprinkle on chopped nuts, colored sprinkles, or coconut before moving the truffle back to your tray. If you wait too long, nothing will stick.
- Final chill:
- Refrigerate the finished truffles for at least 30 minutes so the coating firms up completely and the flavors have time to meld together.
 Pin
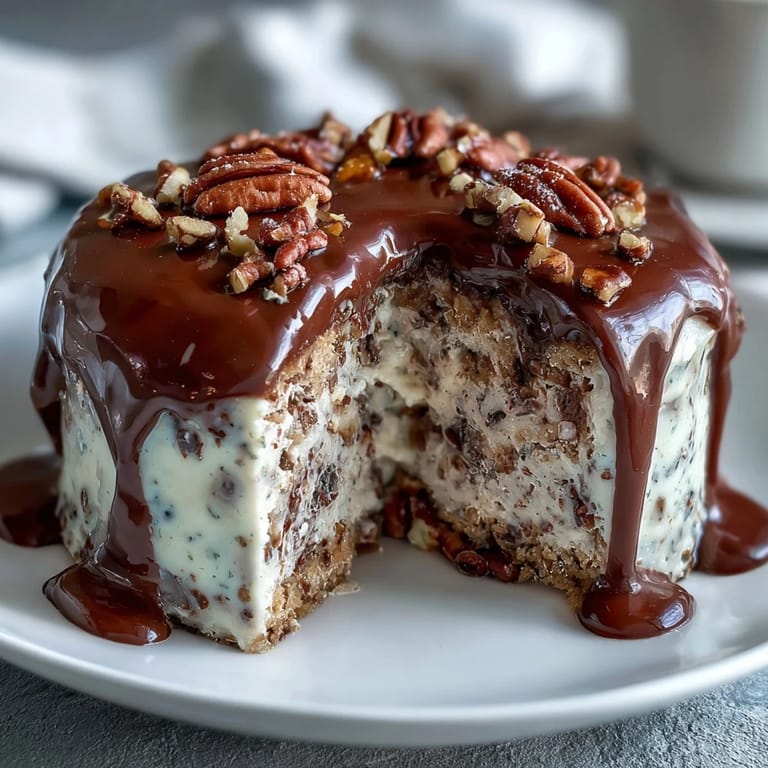
Pin There's something almost meditative about rolling these truffles, and I've found myself making them not just for occasions but on quiet Saturday afternoons when I need to slow down. My daughter now asks specifically for them at her birthday parties, which tells me everything I need to know about whether they're keepers.
Flavor Variations That Work Beautifully
Once you nail the base recipe, you can start playing with additions that make these feel fresh and unexpected. I've added chopped dried pineapple and a pinch of ground ginger for a tropical twist, and another time I mixed in finely chopped candied orange peel that made them taste like something from a fancy chocolatier.
Raisins plumped in warm water for a few minutes before chopping bring a jammy sweetness that deepens the spice notes, and toasted coconut in the truffle base itself gives a subtle nod to carrot cake variations you might find in coffee shops. The beauty is that the cream cheese coating remains the same, so you're really just exploring the center.
Storage and Serving Secrets
These truffles live happily in the refrigerator for up to five days in an airtight container, and I've learned that a layer of parchment between each truffle keeps the coating from sticking to its neighbors. They travel well too, staying firm during car rides and potluck transitions as long as you keep them cool.
For serving at room temperature, pull them out about 10 minutes before guests arrive so the coating softens just enough to feel luxurious, but they won't lose their shape. I've paired them with sparkling wine and chai tea, and both are perfect, though they're honestly wonderful with a simple cup of coffee on a quiet morning.
Making Them Gluten-Free and Allergy-Friendly
If you need to accommodate dietary restrictions, swap the regular graham crackers or digestive biscuits for certified gluten-free versions, and the recipe works exactly the same way because the biscuits are just providing structure and subtle sweetness. The rest of the ingredients are naturally gluten-free, though you'll want to double-check your white chocolate for any sneaky additives.
For nut allergies, use seeds instead—toasted sunflower or pumpkin seeds add that textural crunch and toasty flavor without the allergen concern. Just pulse them so they're not too large, matching the size of finely chopped nuts.
- Always check your white chocolate label for soy and dairy cross-contamination if you're working with serious allergies.
- Dairy-free cream cheese exists and works in a pinch, though the flavor will shift slightly toward less tangy.
- Keep your work surfaces and tools completely separate from allergen-containing foods during preparation.
 Pin
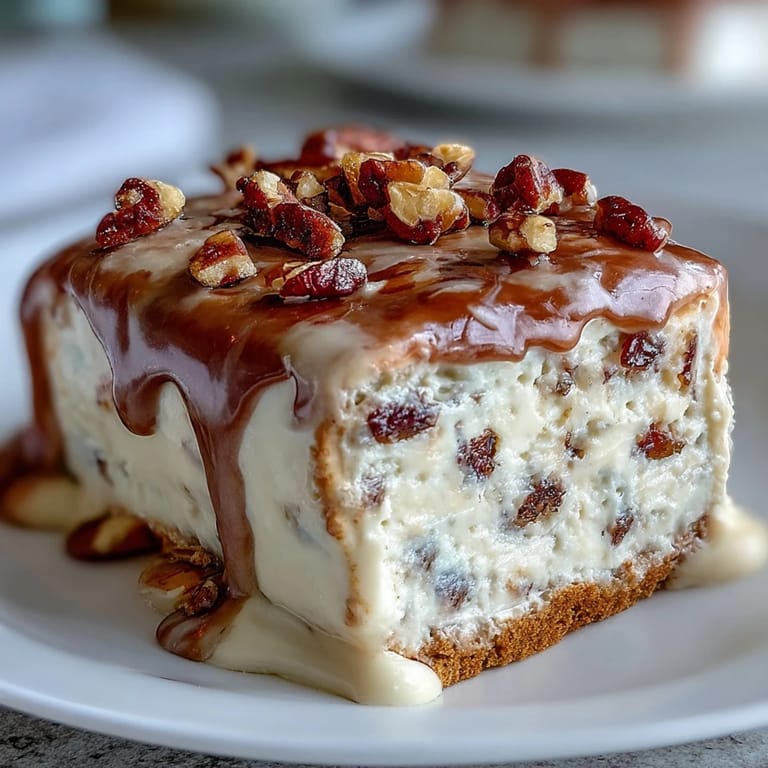
Pin These truffles have become the thing I make when I want to remind myself why I love cooking—simple ingredients transformed into something that tastes like you spent hours on them, shared with people who matter. They're proof that the best desserts aren't always complicated, just thoughtfully made.
Recipe Questions
- → How do I ensure the truffle centers hold together well?
Mix ingredients thoroughly until sticky dough forms, then chill the rolled balls for at least an hour to firm up before coating.
- → Can I substitute the nuts in the truffle base?
Yes, walnuts or pecans work well, and you may also use other toasted nuts to suit your preference.
- → What’s the best way to melt the coating ingredients smoothly?
Melt white chocolate gently over simmering water, then whisk in cream cheese and butter until a glossy, smooth coating forms.
- → How should I store these truffles for maximum freshness?
Keep them refrigerated in an airtight container for up to five days to maintain texture and flavor.
- → Are there options to make this dish gluten-free?
Use gluten-free biscuits in place of regular graham crackers to accommodate gluten-free diets.