 Pin
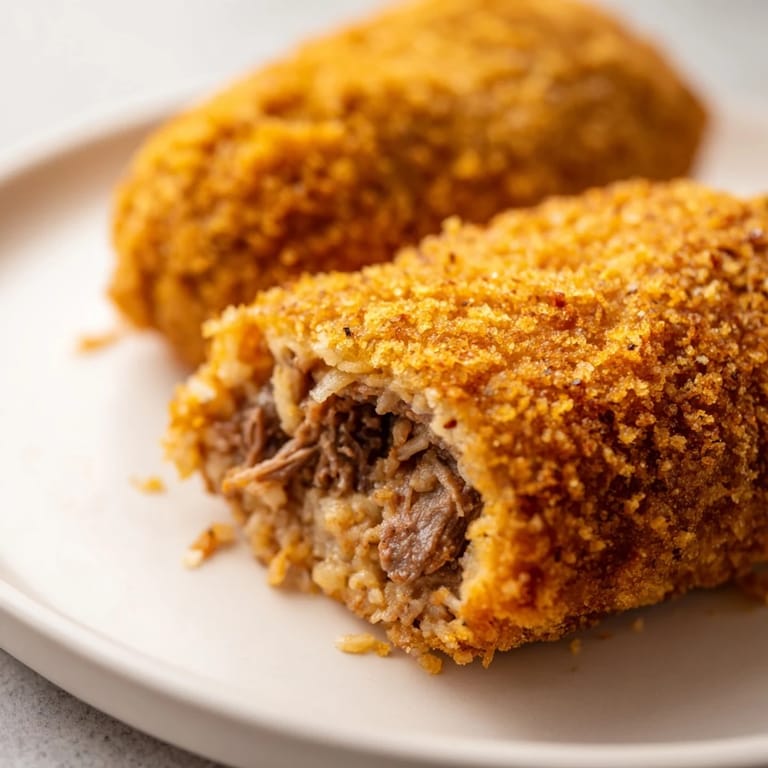
Pin There's something magical about the sound of a croquette hitting hot oil—that immediate sizzle that fills the kitchen with anticipation. My first encounter with these Dutch treasures was at a small hutspot stand in Amsterdam, where an elderly woman with flour-dusted hands handed me one wrapped in paper, steam rising from its golden shell. When I bit into it, the contrast was stunning: a shattering breadcrumb exterior giving way to a silky, beef-rich interior that tasted like comfort itself. I've been chasing that moment ever since, and after countless batches, I've finally cracked the code to recreating that magic at home.
I remember making a batch for my partner's birthday party last autumn, nervous about whether they'd hold up to the crowded kitchen chaos. I had breaded them the night before and stashed them in the freezer, so when guests arrived, I simply slipped them into hot oil in batches while we talked and laughed. What struck me most wasn't the praise (though there was plenty), but how the croquettes became this little moment of joy—people would grab one, take a bite, and pause for a second before going back for another. Food that makes people pause is food that matters.
Ingredients
- Stewing beef (250 g): Chuck or any tough cut actually becomes tender and flavorful after the long simmer, developing a richness that's essential to the filling.
- Beef broth (500 ml): Good broth is worth seeking out; it's the foundation of depth here, so use homemade or quality store-bought if you can.
- Bay leaf: This single leaf subtly transforms the broth—don't skip it, but do remember to remove it.
- Onion (1 small, finely chopped): Chopping it fine helps it meld seamlessly into the filling rather than creating distinct chunks.
- Butter (40 g for roux, 1 tbsp for onions): Use unsalted so you control the seasoning; it keeps the filling tasting fresh instead of overly salty.
- All-purpose flour (40 g for roux, 100 g for coating): The roux flour thickens the filling to the right consistency—too thin and croquettes fall apart when frying.
- Whole milk (150 ml): This mellows the intensity of the beef, creating that luxurious, creamy texture you're after.
- Fresh parsley (1 tbsp, optional): A whisper of brightness; I skip it sometimes when I want the beef to be the star.
- Ground nutmeg (1/2 tsp): Just a hint—this spice is what makes Dutch ragout taste authentically Dutch, but too much becomes medicinal.
- Eggs (2 large): These are your binding agent in the breadcrumb coating, so beat them lightly with a fork just before dipping.
- Fine dry breadcrumbs (150 g): Panko or Dutch paneermeel gives the crispiest results; regular breadcrumbs work but won't achieve that satisfying shatter.
- Neutral oil: Sunflower or canola at 180°C is the sweet spot for even browning without burning the outside.
Tired of Takeout? 🥡
Get 10 meals you can make faster than delivery arrives. Seriously.
One email. No spam. Unsubscribe anytime.
Instructions
- Simmer the beef until it surrenders:
- Combine your beef cubes with broth, bay leaf, and salt in a saucepan and bring everything to a gentle boil before reducing to a soft simmer. You're aiming for beef so tender it falls apart at the touch of a spoon—this usually takes about an hour, maybe a bit longer depending on the cut. The kitchen will smell incredible as it simmers.
- Build your flavor base with the onions:
- Melt that tablespoon of butter in a skillet and let the finely chopped onion turn soft and translucent over a few minutes, then add your shredded beef and stir until everything is combined. Taste as you go and adjust salt and pepper until it feels right—this is where you catch seasoning issues before they're baked into every croquette.
- Create the creamy sauce that holds it all together:
- In a clean saucepan, melt 40 grams of butter, then whisk in 40 grams of flour and let it cook gently for about 2 minutes while stirring constantly—you're making a roux, and this short cooking time builds flavor without browning. Slowly pour in your reserved beef broth and milk, whisking constantly to keep lumps at bay, until you have a silky, thickened sauce.
- Marry the beef and sauce into ragout:
- Add your cooked beef-onion mixture to the creamy sauce along with the nutmeg and parsley, then stir everything together until fully combined and thick enough that a spoon stands upright in it. This creamy, savory mixture is the heart of your croquettes, so make sure it tastes perfect before moving on.
- Chill until the filling is firm enough to shape:
- Spread the ragout into a shallow dish, press plastic wrap directly onto the surface to prevent a skin from forming, and refrigerate for at least an hour or until it holds its shape when you push a spoon into it. This patience now rewards you with croquettes that hold together beautifully when fried.
- Shape your cylinders with cold hands:
- Working quickly so the filling doesn't warm up, shape the chilled ragout into cylinders about 8 centimeters long—they should feel firm and solid. If the filling starts to soften, pop it back in the fridge for 15 minutes.
- Set up your breading station for efficiency:
- Arrange three shallow bowls in a line: one with flour, one with beaten eggs, and one with breadcrumbs, then coat each croquette by rolling it in flour first, dipping it in egg, and finally pressing it into the breadcrumbs until fully covered. For extra-crispy croquettes that'll make you proud, repeat the egg and breadcrumb coating one more time.
- Fry until golden and gloriously crispy:
- Heat your oil to exactly 180°C (350°F)—too hot and the outside burns before the inside warms through, too cool and they become greasy instead of crispy. Fry in batches without crowding the pan for 3–4 minutes until the outside turns deep golden, then lift them out with a slotted spoon and drain on paper towels while they're still hot.
- Serve immediately while they're still shattering:
- The contrast between hot, crispy outside and warm, creamy inside is what makes these special, so get them to the table as quickly as you can. Have mustard standing by for dipping.
 Pin
Pin What I love most about these croquettes is how they've become our version of a special meal—not just something we make for dinner, but something we make when we want to mark a moment or celebrate someone. There's generosity in handing someone a croquette still warm from the fryer, watching their face light up at that first bite.
Making Ahead Like a Pro
One of the best-kept secrets about croquettes is that they actually improve when made ahead. I'll often prepare and bread them the day before, storing them in the freezer between layers of parchment paper so they don't stick together. When it's time to eat, I simply drop the frozen croquettes directly into hot oil and add about 2 extra minutes to the frying time—the exterior becomes impossibly crispy while the filling warms through perfectly. This makes them ideal for entertaining, since you can have everything ready and just fry them when guests arrive.
The Right Oil and Temperature Matter More Than You'd Expect
I spent years getting the texture wrong until I realized I was being careless about the oil itself and how hot it really was. Neutral oils like sunflower or canola have higher smoke points and won't impart flavor that interferes with the beef ragout, which matters more than you'd think. Olive oil, for instance, would fight with the delicate beef flavor and make the crust feel greasy instead of crispy. A good kitchen thermometer is the only way to know your oil is truly at 180°C—eyeballing it will betray you.
Variations and Pairing Ideas
While the classic beef version is my go-to, I sometimes experiment with texture and flavor to keep things interesting. Mixing half beef with ground veal gives a richer, slightly gamey undertone that feels luxurious, and I've had success substituting mushrooms for half the beef when I want something vegetarian-leaning. As for serving, while mustard is the traditional companion, I've discovered that a sharp cheese sauce or a simple aioli works wonderfully, and the croquettes genuinely shine alongside crispy fries and a cold pilsner or pale lager that cuts through the richness.
- Try a veal-beef hybrid for a deeper, more complex flavor profile.
- Pair with cold beer or even a crisp white wine for balance against the richness.
- Leftover croquettes can be revived in a 180°C oven for 8 minutes if you have any the next day.
 Pin
Pin These croquettes have become more than just food in our kitchen—they're an edible way of saying I'm thinking of you, or this moment matters. Every time I hear that satisfying crunch and see someone's eyes light up, I know exactly why they've remained a Dutch favorite for generations.
Recipe Questions
- → What cut of beef works best for these croquettes?
Stewing beef like chuck is ideal for slow simmering until tender, which creates the rich ragout filling.
- → How is the creamy filling prepared?
After stewing the beef, the shredded meat is combined with a roux of butter and flour, gradually mixed with milk and seasoned with nutmeg for depth.
- → Why is chilling the filling important?
Chilling firms the ragout, making it easier to shape into croquette cylinders that hold their structure during frying.
- → Can the croquettes be made ahead of time?
Yes, they can be breaded and frozen before frying. Fry directly from frozen, adding a couple of minutes for thorough cooking.
- → What oil temperature is best for frying?
Maintain the oil at 180°C (350°F) to ensure a crisp, golden crust without absorbing excess oil.
- → Are these croquettes suitable to serve with drinks?
They pair well with crisp pilsners or pale lagers, making them excellent for casual snacking or appetizers.