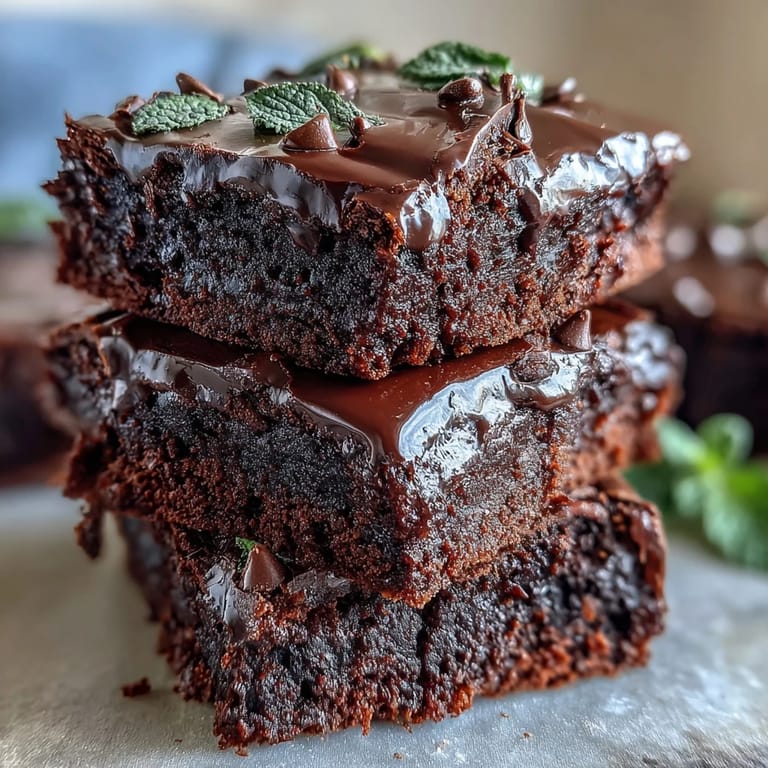
 Pin
Pin My coworker Sarah brought these mint chocolate chip brownie bites to our office on March 17th, and I watched three people go back for seconds before I even realized what was happening. She'd mentioned wanting something festive but not over-the-top, something that felt like St. Patrick's Day without the stereotypical green everything. When she finally shared the recipe, I understood immediately—the deep cocoa richness paired with that cool peppermint snap, with just a hint of green threading through, felt sophisticated and celebratory at once. I made them that weekend and discovered they're the kind of treat that disappears faster than you'd expect, mostly because people can't stop at just one.
I brought a batch to my neighbor's St. Patrick's Day potluck, nestled in a little paper-lined tin with green tissue paper, and watched her eyes light up when she bit into one. She'd been expecting something mass-produced or overly sweet, and instead found this perfect balance of dark chocolate and cooling mint that somehow felt both playful and genuinely delicious. That moment when someone tastes something you made and their whole expression shifts—that's why I keep coming back to recipes like this one.
Ingredients
- All-purpose flour (3/4 cup): The foundation that keeps these bites tender without making them cake-like; measure by spooning into the cup and leveling off, never scoop directly from the bag.
- Unsweetened cocoa powder (1/2 cup): This is where the real chocolate depth comes from, so don't skimp on quality here, and sift it if it looks at all lumpy.
- Baking powder (1/2 tsp): Just enough lift to keep these from being dense hockey pucks, but not so much that they rise and crack on top.
- Salt (1/4 tsp): The secret ingredient that makes chocolate taste more chocolatey and mint taste more minty—never skip it.
- Unsalted butter (1/2 cup, melted and cooled): Melting it first creates a more fudgy texture than creaming; letting it cool slightly prevents the eggs from scrambling.
- Granulated sugar (1 cup): Dissolves into the butter and creates that signature brownie shine and slight crackle on top.
- Large eggs (2, room temperature): Room temperature eggs incorporate more smoothly and create better structure; take them out of the fridge 15 minutes before you start.
- Pure vanilla extract (1/2 tsp): Amplifies the chocolate without competing with the mint.
- Peppermint extract (1/2 tsp): The star of the show here; this is concentrated flavor, so measuring carefully matters.
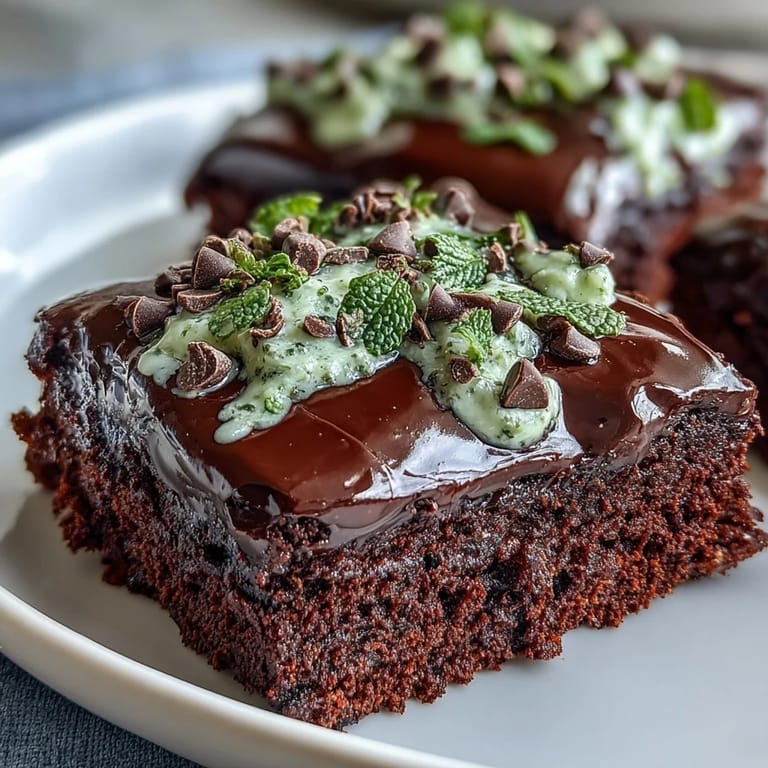
- Green food coloring (2-3 drops, optional): Just enough to hint at the mint theme without turning everything into a candy store.
- Mini chocolate chips (1/2 cup, plus extra for topping): Mini chips distribute better through small bites than regular chips, and they melt into pockets of richness throughout.
- Chopped Andes mints or mint chocolate pieces (1/4 cup, optional): These add texture and an extra punch of mint flavor, but the brownies are delicious without them if you want to keep things simple.
Tired of Takeout? 🥡
Get 10 meals you can make faster than delivery arrives. Seriously.
One email. No spam. Unsubscribe anytime.
Instructions
- Heat your oven and prepare the tin:
- Set the oven to 350°F and either grease your mini muffin tin generously with butter or slip in mini cupcake liners—liners make cleanup easier but grease gives you a slightly crispier edge. Either way, you want no sticking.
- Combine the dry ingredients:
- Whisk together flour, cocoa powder, baking powder, and salt in a medium bowl, breaking up any cocoa clumps as you go. This step distributes the leavening evenly so you don't end up with dense spots.
- Mix the wet base:
- In a large bowl, whisk the cooled melted butter with sugar until they're well combined and slightly lightened in color—this takes about a minute. Add eggs, vanilla, peppermint extract, and food coloring if using; whisk until smooth and homogeneous.
- Fold wet and dry together:
- Add the dry mixture to the wet ingredients and fold gently with a spatula until just combined—you want no white streaks of flour, but you don't want to overwork it either, or you'll develop too much gluten and lose that fudgy texture. Stop folding the moment everything is incorporated.
- Add the mix-ins:
- Stir in the mini chocolate chips and chopped Andes mints if using, distributing them evenly throughout the batter. The batter will be thick and rich-looking, almost like wet cake batter, which is exactly right.
- Fill the tin:
- Spoon batter into each cup, filling each about 3/4 full; overfilled cups will bake unevenly and spill over. If you want extra chocolate flavor, sprinkle a few more chocolate chips on top of each bite before baking.
- Bake with purpose:
- Bake for 13–15 minutes, watching for the edges to look set while the very center still jiggles slightly when you gently shake the tin. A toothpick inserted into the center should come out mostly clean with a few moist, fudgy crumbs—this is the difference between fudgy and dry.
- Cool with patience:
- Let them sit in the tin for 5 minutes so they firm up enough to handle, then turn them out onto a wire rack to cool completely. Trying to eat them warm is tempting but they'll hold together better once they've cooled.
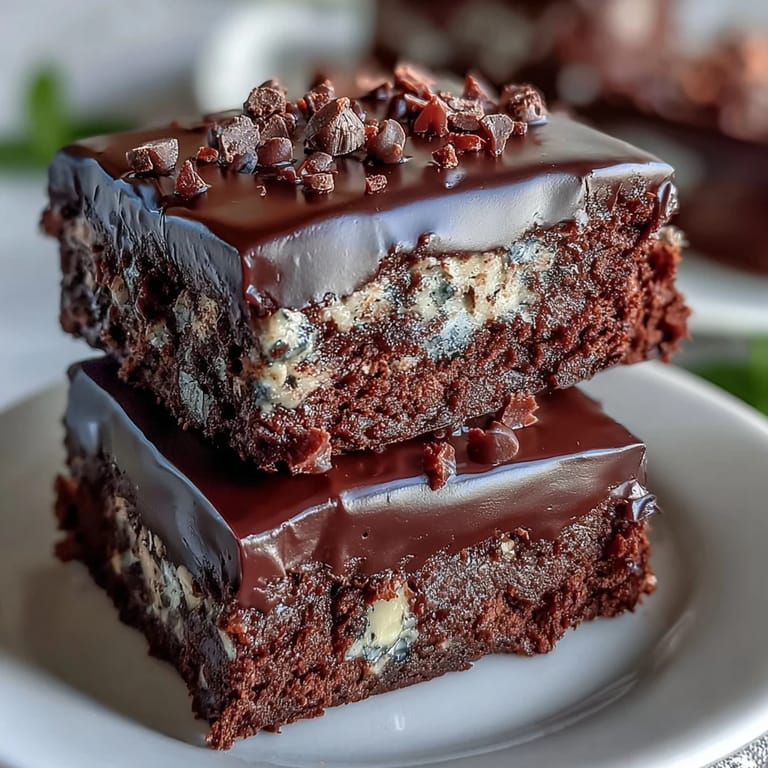 Pin
Pin There's something deeply satisfying about opening a tin of these and watching someone's face register that they're both chocolate and mint and somehow festive without being cutesy. My sister has now requested these for her birthday in April, which tells me they've transcended their St. Patrick's Day origins and become her new favorite treat year-round.
The Mint-Chocolate Balance
Finding the right amount of peppermint extract took me two batches to perfect. The first time I made them, I added an extra 1/4 teaspoon thinking more mint would be better, and ended up with something that tasted less like chocolate with mint and more like mint with a chocolate chaser. The second batch, sticking to the original 1/2 teaspoon, felt balanced—the mint cools your palate and makes the chocolate taste richer, rather than competing with it. If you do want extra mint flavor, add just one more drop of extract and taste the batter before baking; it's one of those adjustments that's better made early than regretted later.
Texture and Moisture
What makes these distinctly brownie and not just chocolate cake comes down to the ratio of butter to flour and the careful baking time. The generous amount of melted butter creates density and fudginess, while avoiding overmixing preserves that slightly irregular crumb structure that brownies are known for. These aren't meant to be fluffy or airy—they're meant to feel almost dense, almost too-rich, with that slight pull at the center when you bite through the slightly crispy exterior. Once they're completely cooled, they hold up beautifully for a few days in an airtight container, and some people swear they taste even better on day two when the flavors have settled.
Make It Your Own
The beauty of these bites is how easily they adapt to what you have on hand or what you're craving. Some people skip the green food coloring entirely and just enjoy the deep brown with the hint of mint, which feels more sophisticated and less costume-y. Others swap the Andes mints for crushed candy canes around the winter holidays, or leave them out completely if you want pure chocolate with just that whisper of peppermint. The recipe is forgiving enough to handle small tweaks, but faithful enough to the original that it'll be delicious no matter what direction you take it.
- If you can't find Andes mints, any mint-flavored chocolate will work, or you can leave them out and increase the chocolate chips instead.
- For a less sweet version, you can reduce the sugar to 3/4 cup, though you'll lose a tiny bit of that brownie shine on top.
- These freeze beautifully for up to a month, so make a double batch and keep some on hand for unexpected celebrations.
 Pin
Pin These little bites have become my go-to for bringing to gatherings where I want to feel prepared but not overwhelmed. They're proof that something festive doesn't have to be complicated, and that sometimes the best treats are the ones that balance flavors so perfectly you can't stop at just one.
Recipe Questions
- → What gives these bites their mint flavor?
Pure peppermint extract and chopped Andes mints infuse the brownies with a cool minty taste.
- → Can I omit the green food coloring?
Yes, the green coloring is optional and only adds festive color without affecting flavor.
- → How do I know when the brownie bites are done baking?
They’re ready when a toothpick inserted comes out mostly clean with a few moist crumbs attached.
- → Can these bites be made vegan or gluten-free?
Modifications would be needed such as using gluten-free flour and vegan butter substitutes.
- → How should I store leftover bites?
Keep them in an airtight container at room temperature for up to five days to maintain freshness.