 Pin
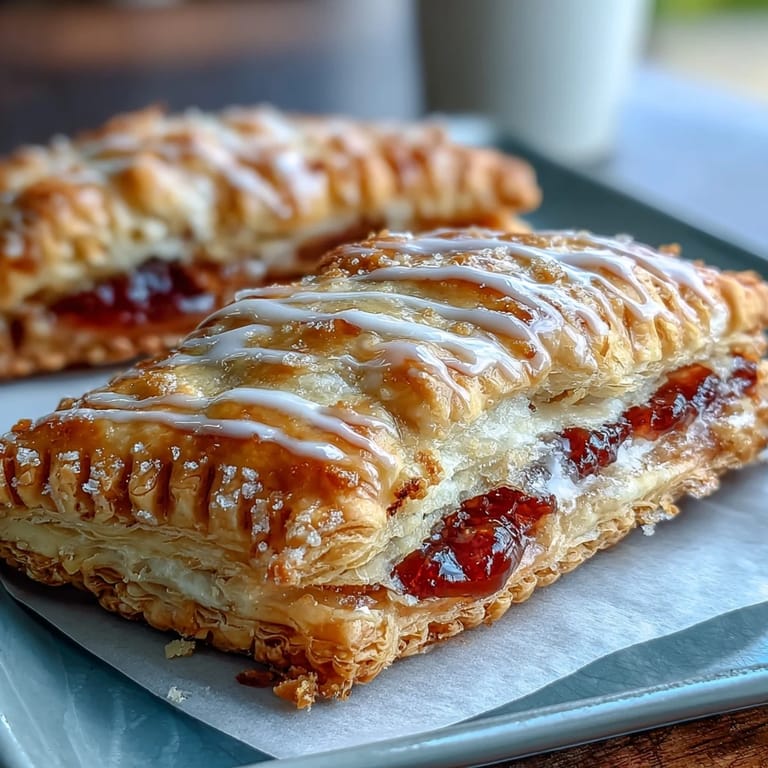
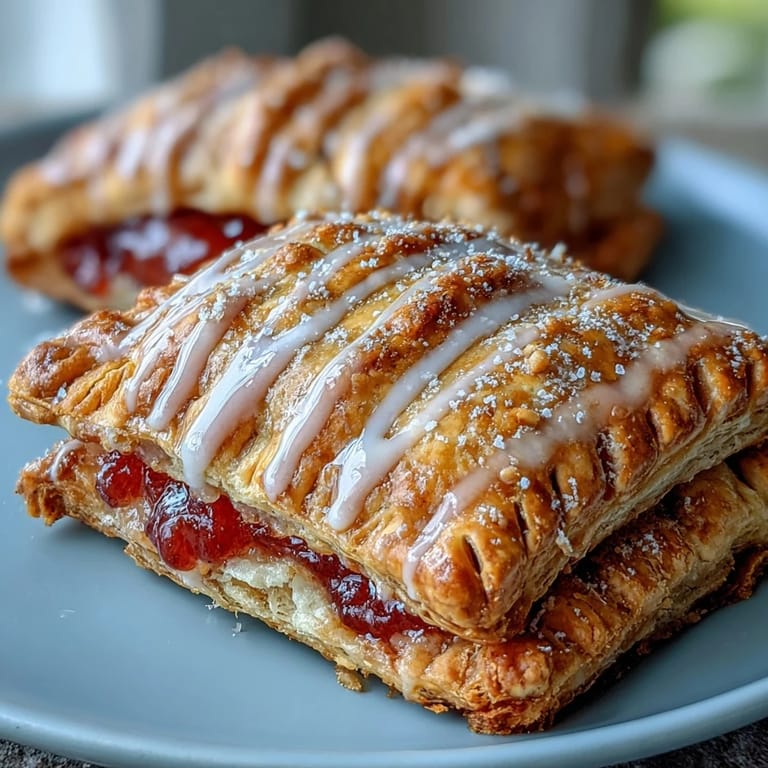
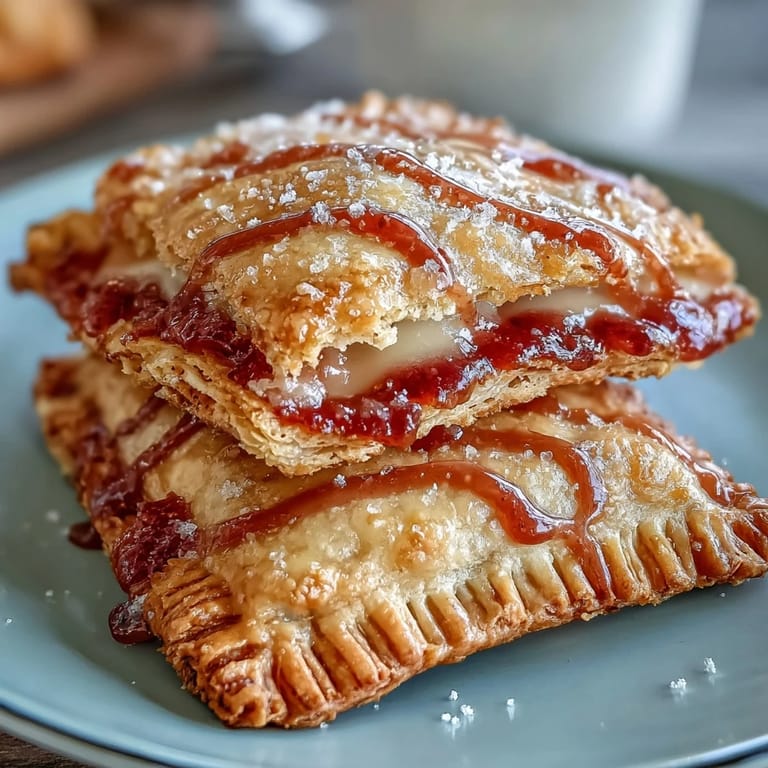
Pin My neighbor brought over a box of homemade guava cheese pastries one afternoon, and I watched her bite into one with such quiet satisfaction that I knew I had to recreate them. The combination seemed impossible at first—sweet tropical guava meeting tangy cream cheese in a buttery, flaky shell—but that first bite changed everything. It tasted like someone had turned a Caribbean vacation into breakfast. Since then, these pop tarts have become my go-to when I want something that feels both nostalgic and adventurous, the kind of treat that makes ordinary mornings feel special.
Last summer, I made a batch for my daughter's school potluck, and three parents asked for the recipe before they even finished eating. One of them later told me she'd tried to reverse-engineer them at home, which somehow made me feel like I'd unlocked a secret worth protecting. Watching people's faces light up when they realize there's both guava jam and cream cheese inside is a small joy that never gets old.
Ingredients
- All-purpose flour: This is your pastry foundation, and using the exact amount matters more than you'd think for getting that shatteringly crisp texture.
- Unsalted butter, cold and cubed: Cold butter is non-negotiable here; it creates those precious flaky layers, so keep it in the freezer until the last possible moment.
- Ice-cold water: Temperature matters because cold water keeps the butter from melting into the flour too early, preserving those essential layers.
- Guava paste or jam: The star of the show—use whatever concentration level you prefer, though paste tends to give cleaner, less-leaky results than runny jam.
- Cream cheese, softened: This cuts through the guava sweetness and adds a luxurious creaminess that elevates the whole experience.
- Powdered sugar and vanilla: These keep the filling balanced and prevent it from tasting one-dimensional or overly tart.
- Egg wash: One beaten egg seals the edges and gives that beautiful golden shine that makes them look bakery-worthy.
- Glaze: The final touch that catches the light and makes them impossible to resist.
Tired of Takeout? 🥡
Get 10 meals you can make faster than delivery arrives. Seriously.
One email. No spam. Unsubscribe anytime.
Instructions
- Build Your Pastry Base:
- Whisk flour, sugar, and salt together, then work in your cold butter until the mixture looks like rough sand with some pea-sized butter pieces still visible. Those little butter specks are what create the flaky layers you're after.
- Bring the Dough Together:
- Drizzle in ice water gradually while mixing gently—you want the dough to just barely come together, not turn into a smooth ball. Once it holds together, divide it in half, flatten each into a disk, wrap in plastic, and chill for at least 30 minutes while you handle other tasks.
- Create the Filling:
- While the dough rests, blend softened cream cheese with powdered sugar and vanilla until completely smooth and lump-free. This filling should be spreadable but not runny.
- Roll and Cut:
- On a lightly floured surface, roll one dough disk thin—about an eighth of an inch—then cut it into eight rectangles roughly 3 by 4 inches. Work quickly so the dough doesn't warm up too much.
- Fill with Care:
- Place a teaspoon of guava paste and a teaspoon of cream cheese mixture in the center of four rectangles, leaving a half-inch border all around. This border is crucial for sealing.
- Seal the Pop Tarts:
- Brush the borders with beaten egg, top with the remaining rectangles, then press the edges firmly to seal them. A fork crimped around the perimeter adds both visual appeal and extra security against leaks.
- Chill Again:
- Transfer to a parchment-lined baking sheet and refrigerate for 10 minutes before baking; this helps everything hold its shape in the oven.
- Prepare for Baking:
- Preheat your oven to 375 degrees Fahrenheit, give the pop tarts another egg wash brushing, and prick the tops a few times with a fork to let steam escape. This prevents them from puffing up like pillows.
- Bake Until Golden:
- Bake for 22 to 25 minutes until the pastry is deep golden brown and crispy. The kitchen will smell absolutely incredible at this point.
- Glaze and Set:
- Once completely cooled, whisk powdered sugar, milk, and vanilla until smooth and pourable, then add a drop of pink or red food coloring if you like. Drizzle or spread generously over each pop tart and let the glaze set before serving.
 Pin
Pin There's something deeply satisfying about watching someone take their first bite of something you made with your hands, especially when they weren't expecting it to taste this good. These pop tarts have become my quiet kitchen victory, the thing I make when I want to remind myself and the people around me that breakfast can be an occasion worth celebrating.
Why Homemade Pastry Matters Here
Store-bought pastry sheets are convenient, but there's a textural difference that's worth the extra 30 minutes—homemade pastry shatters on your teeth in the most satisfying way, with layers that taste buttery and tender rather than dense and uniform. The first time I made these with homemade dough instead of shortcutting it, I understood why my neighbor's were so special. Building your own pastry gives you control over how cold everything stays and which butter pieces survive the fold, and that control translates directly into a superior result.
Filling Variations to Explore
While guava and cream cheese is genuinely perfect, this filling concept opens up a whole world of combinations worth experimenting with. Strawberry jam with a whisper of almond extract, mango paste with a tiny bit of lime zest, or even peach with cardamom all create different moods but follow the same delicious formula. I've had the most fun playing with different cream cheese ratios too—more cream cheese makes it tangier, less makes the fruit flavor shine brighter, so adjust based on what your taste buds are craving.
Storage and Make-Ahead Wisdom
These keep beautifully in an airtight container for up to three days, which makes them ideal for preparing ahead or having something special ready for weekday breakfasts. The pastry actually tastes better after a day of resting as the flavors settle and meld. You can also freeze unbaked pop tarts for up to a month—just add an extra 3 to 5 minutes to the baking time if baking straight from frozen, and there's something wonderful about having homemade pop tarts ready whenever the craving strikes.
- Assemble and freeze on a tray before transferring to a freezer bag so they don't stick together.
- Leftover dough scraps can be baked with a sprinkle of cinnamon sugar for an instant snack.
- If your glaze sets too quickly, add milk a tiny bit at a time to loosen it back up.
 Pin
Pin Making these pop tarts feels like a small act of care toward yourself and anyone lucky enough to eat them. There's a reason homemade pastry tastes like love—because it takes time, attention, and the decision to do something the slower, better way.
Recipe Questions
- → Can I use store-bought pie crust instead of homemade dough?
Yes, refrigerated pie crust works well as a time-saving alternative. Roll it out slightly thinner and proceed with the same assembly instructions. You'll need two standard pie crusts to yield 8 pastries.
- → What's the best way to store these pastries?
Store completely cooled pastries in an airtight container at room temperature for up to 2 days. For longer storage, refrigerate for up to 5 days, though the glaze may soften slightly. They can also be frozen unglazed for up to 3 months.
- → Can I make the dough ahead of time?
Absolutely. Prepare the dough, wrap it tightly in plastic, and refrigerate for up to 2 days or freeze for up to 3 months. Thaw frozen dough overnight in the refrigerator before rolling out.
- → What other fruit fillings work well?
Strawberry, apricot, raspberry, or pineapple preserves pair beautifully with cream cheese. Membrillo (quince paste) offers a similar texture to guava paste. For a tropical twist, try mango or passion fruit curd.
- → Why do my pastries leak during baking?
Overfilling or inadequate sealing causes leaks. Use only 1 teaspoon of each filling, leave a clean border, and press edges firmly together. Crimping with a fork creates a tight seal. Chilling filled pastries for 10 minutes before baking also helps.
- → Can I make these dairy-free?
Use vegan butter sticks and plant-based cream cheese alternative in the filling. For the egg wash, substitute with maple syrup or plant milk mixed with a little corn syrup. The texture and flavor will remain similar.