 Pin
Pin I'll never forget the first time I created a movie night munchie board for my friends. It was a lazy Friday evening, and instead of ordering takeout, I decided to raid my pantry and create something special. As I arranged vibrant piles of chocolate, cheese, and popcorn on a big wooden board, I realized I was building more than just a snack platter—I was creating an invitation to relax, laugh, and enjoy good company. That night, watching everyone reach for their favorite bites while we got lost in the film, I knew this would become my signature move for every gathering.
The real magic happened at my roommate's birthday celebration when I brought out this board. She took one look and literally gasped—and suddenly, the whole evening became about gathering around that board, sharing bites, making jokes about which snack belonged to whom. I watched people who'd never met before bonding over whether they were team chocolate or team pretzel, and I realized that the best recipes aren't measured in calories or prep time; they're measured in the moments they create.
Ingredients
- Freshly popped popcorn or themed candies (8 cups or 2 cups): This is your anchor, your showstopper centerpiece. Fresh popcorn carries that warm, welcoming aroma that instantly sets the movie night mood, while candies like M&M's bring color and nostalgia. I learned to pop my own popcorn rather than using pre-bagged because the freshness is noticeably better, and it fills the room with that irresistible smell.
- Bite-sized cheese cubes (1 cup): Cheddar, gouda, or pepper jack all work beautifully. The key is cutting them roughly the same size so they look intentional and are easy to grab one-handed while you're focused on the screen.
- Mini pretzels (1 cup): These are your textural anchor—they stay crisp for hours and provide that satisfying crunch that balances softer snacks.
- Seasoned crackers (1 cup): Cheese crackers or wheat thins add sophistication and fill gaps visually. They're humble but essential.
- Roasted, salted nuts (1 cup): Peanuts, cashews, or mixed nuts bring protein and richness. Toast them yourself if possible—store-bought is convenient, but homemade roasted nuts taste noticeably more flavorful.
- Chocolate squares or mini candy bars (1 cup): This is where you can go fancy or fun. Dark chocolate feels elegant, while Snickers or Reese's feel playful. Choose based on your crowd's mood.
- Caramel corn or toffee pieces (1 cup): The sweet-salty combo here is addictive. I once made the mistake of using plain popcorn as both the centerpiece and a snack section—don't do that. Keep varieties distinct.
- Dried fruit (1 cup): Apricots, cranberries, or apple rings provide brightness and contrast. They feel like a healthier choice without tasting like a compromise.
- Chocolate-dipped cookies (1 cup): Mini Oreos or biscotti bites add elegance. There's something about a chocolate-dipped cookie that feels intentionally thoughtful rather than accidentally thrown together.
- Seedless grapes and fresh strawberries or apple slices (1 cup each, optional): These fresh elements prevent the board from feeling one-note. The key—and I learned this the hard way after a soggy disaster—is to pat them completely dry so they don't turn your crackers soft.
Tired of Takeout? 🥡
Get 10 meals you can make faster than delivery arrives. Seriously.
One email. No spam. Unsubscribe anytime.
Instructions
- Choose Your Canvas:
- Select a large, flat board or tray—at least 16 by 12 inches. I use a wooden cutting board because it photographs beautifully and feels inviting. Make sure it's completely clean and dry before you start. This is your blank canvas, so treat it with intention.
- Anchor with a Bowl:
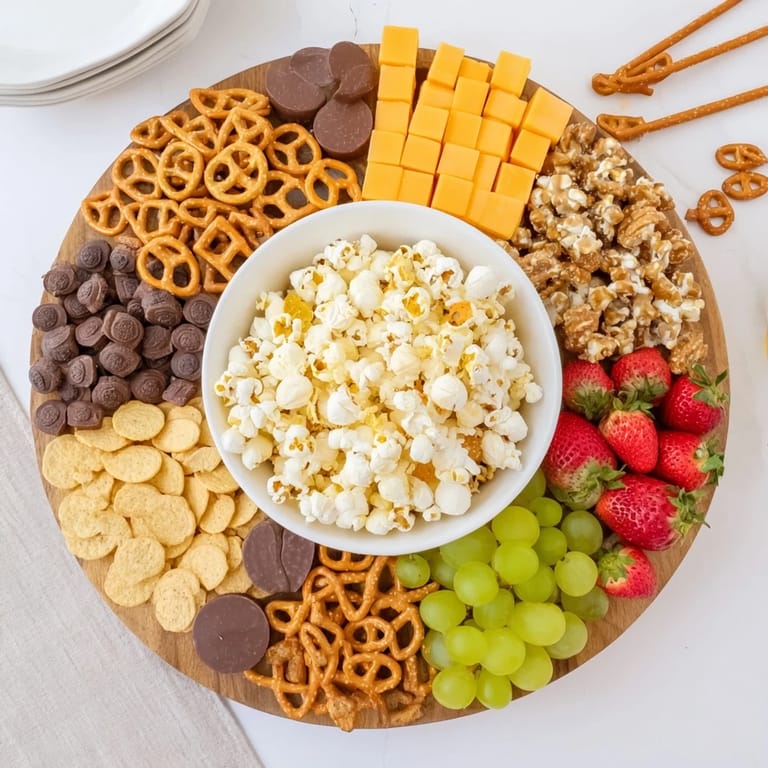
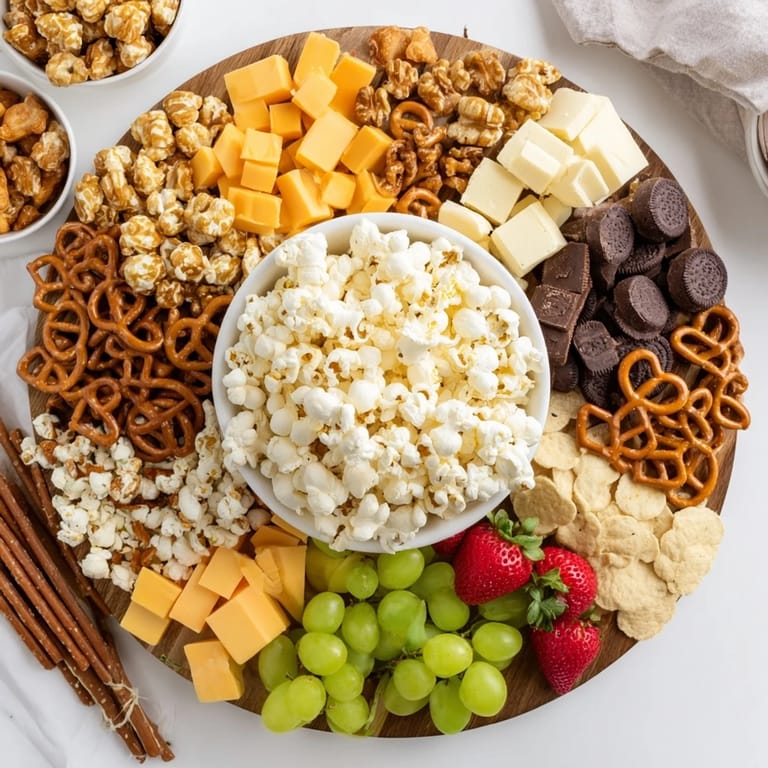
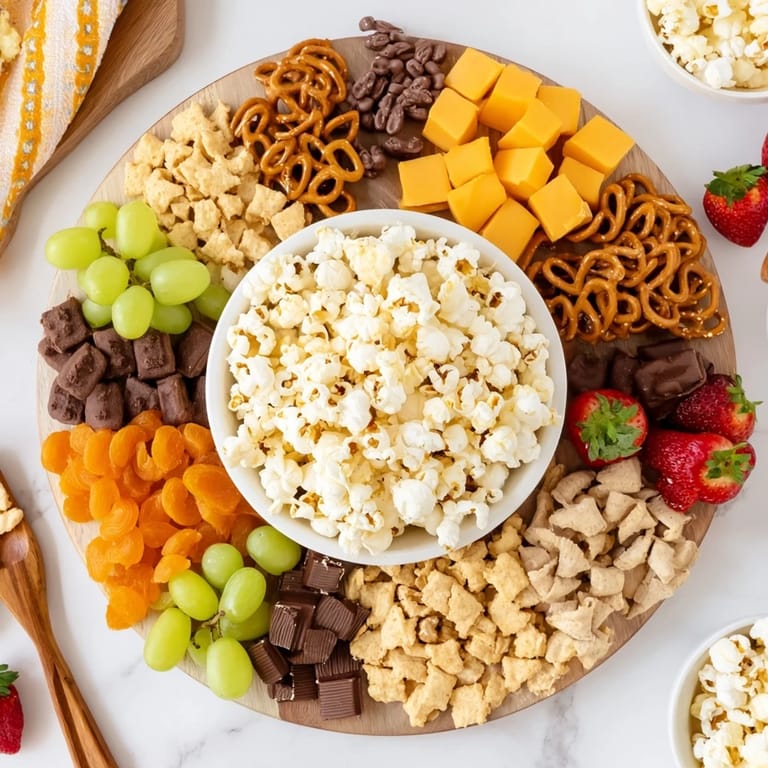
- Place a medium bowl (about 6 inches across) right in the center of your board. This is your focal point—it draws the eye and organizes everything else around it. Fill it with your chosen centerpiece: freshly popped popcorn or themed candies. If using popcorn, keep the bowl slightly heaped so it looks generous and abundant.
- Map Out Your Sections:
- Before placing anything else, mentally divide your board into a grid. Think of it like a paint-by-numbers—this space is for cheese, this corner for dried fruit, that strip for pretzels. Having a rough plan prevents last-minute rearranging and ensures balance. I usually do savory and sweet in alternating sections so guests naturally mix flavors if they want to.
- Layer the Savory Snacks:
- Start with cheese cubes—arrange them in a single, neat layer in their section. Follow with mini pretzels in an adjacent area, keeping them in neat rows so they look intentional, not scattered. Add seasoned crackers and roasted nuts in their own sections, maintaining that grid effect. Each type should be visually separate so guests can easily identify what they're grabbing.
- Fill In the Sweet Sections:
- Now add your chocolate squares, caramel corn, dried fruit, and chocolate-dipped cookies to their designated areas. This is where you can get creative with arrangement—I sometimes group items by color (all the dark chocolates together, all the bright dried fruit in one corner) to make it visually stunning. Keep flavors from mingling by using small dividers or just leaving slightly more space between types.
- Add Fresh Touches (If Using):
- Place grapes in small clusters along the edges or in corners. Position strawberries or apple slices in neat piles. This is where the board goes from impressive to show-stopping. The fresh fruit should be completely dry—I pat mine with paper towels twice to be sure—so it doesn't introduce moisture that softens your crispy snacks.
- Polish and Perfect:
- Step back and look for empty spaces. Fill any gaps with extra popcorn, nuts, or candies so the board looks abundant and full. Wipe any crumbs or smudges from the board's edges for a clean frame. The finished board should feel colorful, inviting, and clearly organized with distinct sections.
- Set Up for Sharing:
- Place small tongs or spoons near each section, or offer cocktail napkins and small plates for guests. This prevents people from double-dipping or mixing snacks with their hands, keeping everything clean and fresh-tasting throughout the movie.
 Pin
Pin I'll always remember when my usually quiet neighbor came to a movie night and spent the entire film reaching for different combinations of snacks, discovering favorites she'd never paired before. By the end of the night, she was crafting her own bite combinations and teaching others what she'd discovered. That's when I realized this board wasn't just about feeding people—it was about creating an experience of exploration and comfort.
The Art of Visual Appeal
The most important thing I've learned is that your board is judged first with the eyes, then with the mouth. Before anyone tastes anything, they're taking in the colors, the arrangement, the sense of abundance. Use contrast—pair light cheese next to dark chocolate, bright berries next to pale crackers. Arrange items in neat rows or clusters rather than scattering them randomly. The grid effect I mentioned earlier isn't just functional; it makes the board feel curated and intentional. Think about height too—stack some items, lay others flat, create little peaks and valleys so the board has dimension and doesn't look flat or boring.
Timing and Temperature
Assemble your board as close to serving time as possible—ideally no more than 30 minutes before guests arrive. Crackers and popcorn begin losing their crunch as soon as they're exposed to air, and fresh fruit starts to oxidize. However, if you're planning ahead, you can prep all your components in advance (cut cheese, portion nuts into small bowls, slice fruit and store it in the fridge) and then arrange everything on the board right before the movie starts. The popcorn should still be warm or at room temperature when the guests first see it—that warmth is part of the appeal. If you're making the board hours in advance, keep the popcorn in a separate covered container and add it to the bowl just before guests arrive.
Customization and Dietary Considerations
One of the best things about this board is how easily it adapts. Have vegan friends coming? Swap dairy cheese for cashew cheese, use dairy-free chocolate, and fill those spaces generously. Gluten-free guests? Substitute regular crackers and pretzels with gluten-free versions—they work just as well visually. The beauty is that you're not changing the concept; you're just swapping ingredients while maintaining the same structure and appeal. I've also added themed candies for special occasions—candy corn in October, red and green candies in December, rainbow candies for pride celebrations. It's a simple way to make the board feel personalized without adding extra work.
- Keep a mental note of any allergies and create a small labeled section or place those snacks on a separate small board to prevent cross-contamination.
- If you're serving multiple boards (for large parties), make one nut-free board and one standard board so nut-allergic guests have plenty of options.
- Always mention the main allergens present—dairy, gluten, nuts, soy—so guests can make informed choices.
 Pin
Pin This board isn't just food; it's an invitation to slow down, share, and enjoy a moment with people you care about. Every time I make one, I'm reminded that sometimes the most memorable meals aren't the complicated ones—they're the ones that bring people together in the simplest, most joyful way.
Recipe Questions
- → What snacks work best for the board?
Include bite-sized cheeses, mini pretzels, seasoned crackers, roasted nuts, chocolate squares, caramel corn, dried fruit, and chocolate-dipped cookies for balanced flavors.
- → How should I arrange the snacks?
Place a central bowl with popcorn or themed candies, then organize the other snacks into distinct savory and sweet sections in a grid layout to keep flavors separate and visually appealing.
- → Is fresh fruit necessary on the board?
Fresh fruit is optional but adds refreshing balance and color. Be sure fruits are dried to avoid moisture affecting crunchy items.
- → How long can I keep leftover snacks?
Store dry snacks in airtight containers at room temperature for up to three days. Discard fresh fruit left unrefrigerated over two hours for safety.
- → What tools help with assembly?
Use a large serving board, a medium bowl for the centerpiece, small tongs or spoons for serving, a paring knife for slicing, and paper towels for drying fruits.