 Pin
Pin There's something almost magical about the sound of a panini press closing—that gentle hiss as the bread makes contact with the hot plates, and suddenly you're holding a completely transformed sandwich. I discovered this during a particularly lazy weekend when I was trying to elevate leftovers into something special, and it clicked instantly. The press doesn't just warm your sandwich; it creates this textural contrast that a regular toaster or skillet simply can't match. Now I find myself planning sandwiches just so I have an excuse to use it, experimenting with flavor combinations that would seem ordinary on a plate but become something genuinely exciting once pressed and crisped.
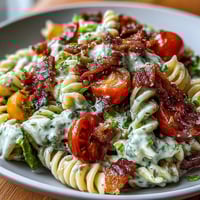
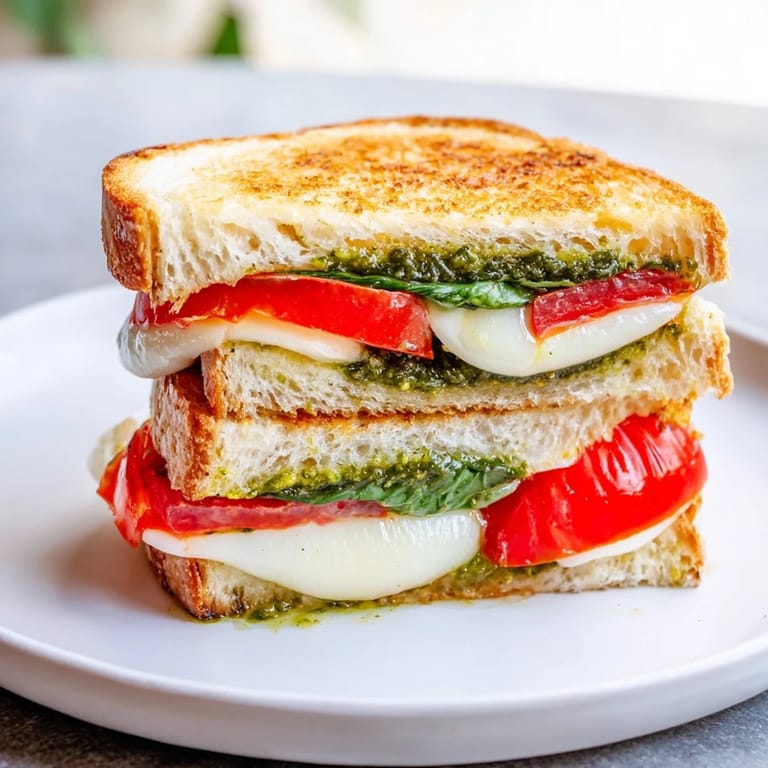
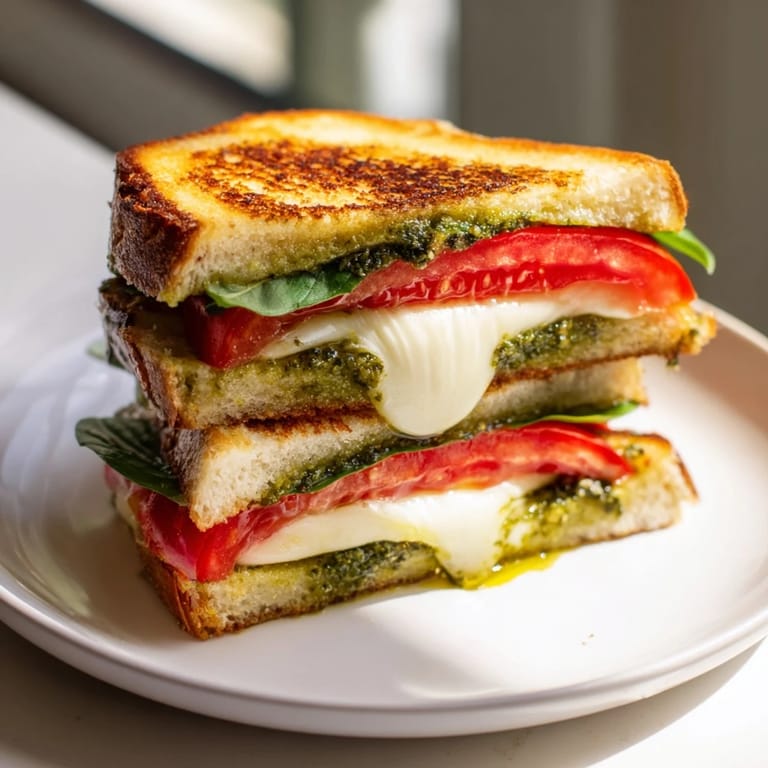
I remember making the Caprese version for a friend who'd been skeptical about my panini enthusiasm, and watching their expression shift from polite interest to genuine delight was worth every ounce of my evangelizing. They bit into it expecting an ordinary tomato sandwich, and instead found this perfect marriage of toasted sourdough, warm mozzarella that actually pulled apart slightly, and basil that had somehow become more fragrant from the heat. That moment basically solidified my belief that a panini press is one of those kitchen tools that quietly changes how you think about simple food.
Ingredients
- Sourdough, ciabatta, multigrain, or focaccia bread: The bread is honestly the foundation here—choose something sturdy enough to handle the press without falling apart, with enough character to taste good when it's golden and crispy.
- Basil pesto: Homemade is incredible if you have time, but a quality jarred version does the job; it becomes almost more fragrant once the sandwich presses and heats.
- Fresh mozzarella: Sliced rather than shredded gives you those perfect melty pockets; get the best quality you can find because it really shines here.
- Tomatoes: Medium, ripe ones work beautifully; seed them lightly if they seem particularly juicy or your sandwich will steam rather than crisp.
- Turkey breast, cooked chicken, or vegetables: Whatever your protein or filling base is, make sure it's flavorful on its own—the press amplifies taste, not saves bland ingredients.
- Cheese varieties: Swiss, pepper jack, feta—each brings something different; shredded versions melt faster than slices, so plan accordingly.
- Condiments and spreads: Cranberry sauce, BBQ sauce, hummus, pesto—these are your flavor anchors, so don't skimp or go for the cheapest version.
- Olive oil or butter: Brushing the outside is what creates that golden crust; don't skip this step or you'll get disappointing pale bread.
Tired of Takeout? 🥡
Get 10 meals you can make faster than delivery arrives. Seriously.
One email. No spam. Unsubscribe anytime.
Instructions
- Get Your Press Ready:
- Preheat your panini press according to its instructions—this usually takes about 5 minutes, and a properly heated press is what creates that crucial golden crust instead of just warming bread.
- Lay Out Your Foundation:
- Place two slices of bread on your cutting board, and this is where you start imagining the sandwich rather than just assembling it; think about weight distribution and how flavors will interact.
- Spread Your Flavor Base:
- Apply your chosen condiment—pesto, sauce, hummus—to the inner sides of both bread slices, using about a tablespoon per side; this is your insurance against a dry sandwich.
- Layer with Purpose:
- Start with something that won't slide around, then build up your fillings, finishing with greens on top so they don't wilt entirely before the press closes. Think of it like constructing a gentle tower rather than overstuffing.
- Seal and Brush:
- Close your sandwich gently and brush both outer sides lightly with olive oil or spread with butter—this is the critical step that separates a steamed sandwich from a beautifully crisped one.
- Press with Confidence:
- Place your sandwich in the press and let it do its work for 4 to 6 minutes, depending on how dark you like your crust and how thick your fillings are; resist the urge to peek or press down harder—patience makes the difference.
- Rest and Serve:
- Remove carefully with a spatula, let it cool for just a minute so you don't burn your mouth, then slice diagonally and serve while it's still warm enough that the cheese is actually melty.
 Pin
Pin What struck me most was realizing that panini-making is oddly meditative—there's something satisfying about the intentionality of layering, the simplicity of the cooking process, and that moment when what emerges is genuinely better than the sum of its parts. It's the kind of cooking that doesn't require stress or fancy techniques, just thoughtfulness and good ingredients.
The Four Combinations, Explained
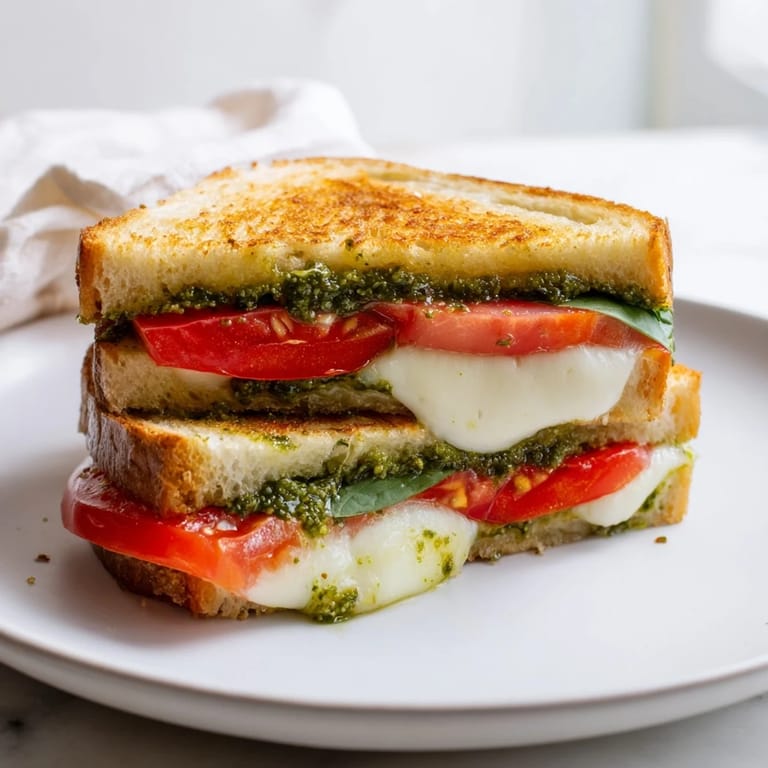
Each of these combinations teaches you something different about how flavors interact under heat. The Caprese is your starting point—it's almost impossible to mess up, and it shows you exactly how the press works with delicate, fresh ingredients. The Turkey and Cranberry plays with the sweet-savory contrast and teaches you that sometimes unexpected flavor combinations are exactly what your palate was waiting for. The Mediterranean Veggie proves you don't need meat to have a genuinely satisfying sandwich; it's about building depth with layers of different textures and flavors. The Spicy BBQ Chicken is the one that shows you how heat and smoke notes come alive in a warm, pressed environment—it's bolder than the others, and that's the point.
What Actually Happens Inside the Press
The magic is part physics, part chemistry, and entirely worth understanding. The heat compresses your sandwich, which forces flavors to interact more intensely than they would otherwise—the cheese doesn't just melt, it melds slightly with the bread. Moisture in your vegetables and spreads turns to steam, which is why moisture control matters. The outer surface of the bread undergoes the Maillard reaction, which is that golden-brown deliciousness that happens when proteins and sugars heat up together. If your sandwich is assembled thoughtfully, all of this creates something cohesive; if it's haphazardly thrown together, it just becomes hot and mushy. The five-minute window is your sweet spot for most combinations—enough time for cheese to melt and bread to crisp, but not so long that the center stays cold while the outside burns.
Beyond the Basics
Once you've made a panini or two, you'll start seeing sandwich possibilities everywhere. Leftover roasted vegetables, deli meats that are about to hit their expiration date, that half-block of cheese in the back of your fridge—suddenly everything is panini material. The real skill isn't in following recipes; it's in understanding which flavor profiles complement each other and which textures work when pressed together. You'll also discover that the bread type matters enormously; a soft sandwich bread will compress into something like a grilled cheese, while something hearty like sourdough stands up to the pressure and maintains structure. The butter or oil on the outside matters more than you'd think—it's the difference between crust and crumb.
- Caramelized onions or pickled vegetables add complexity and don't add moisture the way fresh vegetables might.
- Plant-based proteins like marinated tempeh or chickpea-based spreads work beautifully and deserve the same respect you'd give to traditional fillings.
- Don't press the sandwich yourself with the lid—let the machine do its job, or you'll squeeze out all the goodness and get a flat, dense result.
 Pin
Pin A panini press is one of those quiet investments that pays dividends every time you use it—it takes an ordinary lunch and makes it something you actually look forward to. That five-minute transformation from assembly to golden, melty perfection is genuinely worth celebrating.
Recipe Questions
- → How do I achieve the perfect crispy exterior?
Brush the outer sides of the bread lightly with olive oil or butter before pressing to ensure a golden, crisp crust.
- → Can I use different breads for these sandwiches?
Yes, options like sourdough, ciabatta, focaccia, or multigrain all work well and add distinct textures and flavors.
- → How long should I press the sandwiches?
Cook each sandwich for about 4–6 minutes, until the bread is golden and the fillings are heated through and melty.
- → Are there vegetarian options included?
Yes, the Mediterranean Veggie sandwich uses grilled vegetables, feta cheese, and hummus for a satisfying meat-free choice.
- → What are some suggested serving ideas?
Pair with a simple side salad or soup; consider a crisp Pinot Grigio for Caprese or a light red wine with BBQ Chicken options.