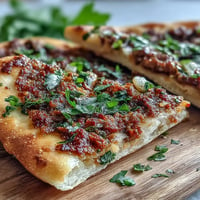
 Pin
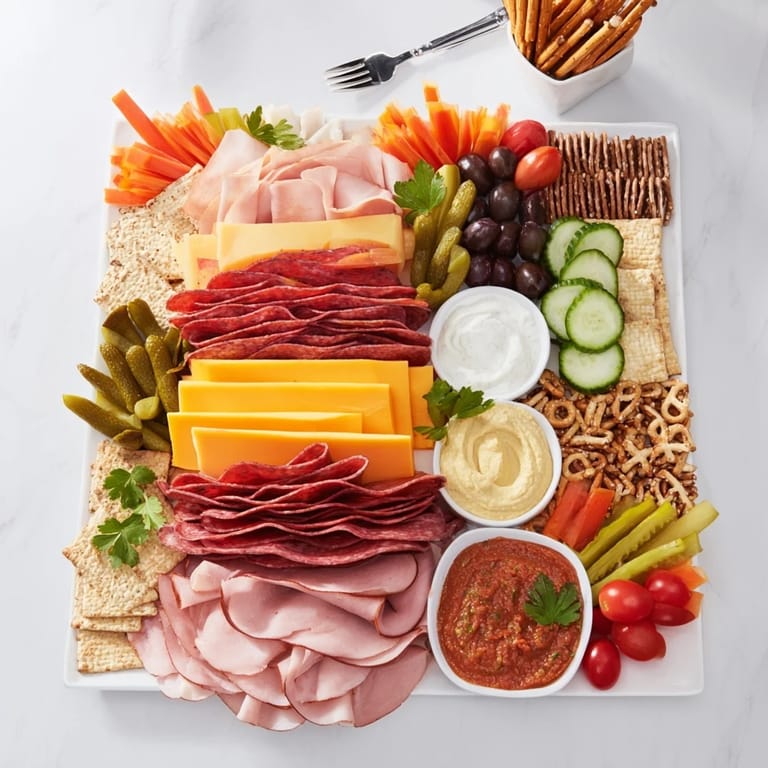
Pin I'll never forget the autumn afternoon when my buddy Marcus pulled up to the tailgate with a mandate: bring something that could survive an hour of tailgating, look absolutely stunning, and keep twenty hungry people happy without requiring a single reheating. That's when the Power Stack was born. I realized that the secret wasn't fancy cooking—it was architecture. By layering robust meats, assertive cheeses, sturdy breads, and vibrant vegetables with real intention, I created something that looked like it belonged at a magazine shoot but tasted even better than it photographed.
I still think about the Super Bowl party where someone actually said, "This board fed more people than I expected with less mess than any three separate platters would have." That's when I knew this wasn't just a board—it was a problem-solver. It became our signature move: pull up, set it down, let gravity and good planning do the work while everyone celebrates around it.
Ingredients
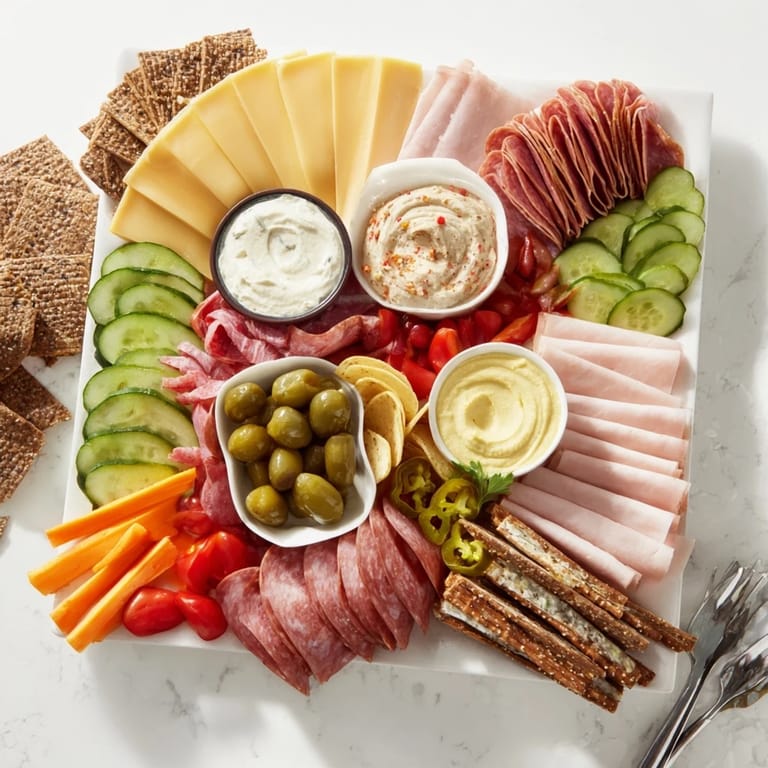
- Smoked turkey breast, 200g, thickly sliced: Provides lean protein that holds its shape during stacking and won't weep moisture that compromises your structure. The subtle smoke flavor anchors the whole flavor profile without being aggressive.
- Black forest ham, 200g, thickly sliced: This is your color hero—that deep mahogany tone becomes your visual anchor point. Slice it thick because thin ham will fold into itself and disappear when you're building.
- Peppered salami, 200g, thickly sliced: The robust spice cuts through creamy dips beautifully and stays firm under pressure. Don't substitute with soft salami—you need the structure.
- Roast beef, 150g, thickly sliced: Adds earthiness and a different texture entirely. The key is getting it sliced fresh at the deli counter, not packaged, because you need pieces that can actually fold without tearing.
- Sharp cheddar, 150g, cut into thick batons: Sharp cheddar has enough flavor punch to stand up against bold dips and salty meats. Batons work better than cubes because they stack like architecture instead of rolling everywhere.
- Swiss cheese, 150g, cut into thick batons: The holes in Swiss actually help with airflow and prevent sweating, which keeps your board looking fresh. The mild nuttiness bridges aggressive and delicate flavors perfectly.
- Pepper jack, 150g, cut into thick batons: This brings heat and visual interest with those jalapeño flecks. Cut it thick enough that it won't crack or shatter when you're maneuvering pieces around.
- Baguette, 1 whole, sliced into ½-inch rounds: The air pockets in a good baguette are load-bearing—they support weight without crushing. A proper half-inch slice gives you surface area for dips without being so thick it's unwieldy.
- Sturdy multigrain crackers, 200g: Multigrain means they've got texture, structure, and actual flavor that doesn't compete with your meats and cheeses. They're your structural filler that also happens to taste incredible.
- Pretzel crisps, 200g: These are genius because they're literally engineered not to break, and they give you that salt-forward crunch that makes people keep coming back. Thicker than regular crackers, they survive transport and handling.
- Creamy ranch dip, 1 cup: Ranch is the universal translator in any crowd. Make sure it's genuinely creamy—the kind that coats your tongue—not thin and watery.
- Chunky salsa, 1 cup: Texture matters here. Chunky means it won't soak into bread and turn it to paste. The brightness of cilantro and lime cuts through the richness of cheeses.
- Classic hummus, 1 cup: This is your bridge to lighter tastes and gives you something for the vegetable dippers that isn't pure indulgence. The tahini provides depth that plain yogurt dips can't touch.
- Guacamole, 1 cup: Fresh guacamole oxidizes, so assemble it last and spritz the surface with lime juice. It's the fancy element that makes people feel celebrated.
- Cherry tomatoes, 1 pint, halved: Halving them prevents rolling and creates little flavor bombs. They're your brightest color accent and should be visibly ripe.
- English cucumber, 1 large, cut into thick rounds: English cucumbers have fewer seeds and thinner skins, so they feel less watery. Thick rounds stack better than thin slices.
- Bell peppers, 2 (red and yellow), cut into strips: The red and yellow combination is purely visual genius. Cut them thick enough that they stay crisp and don't become bendy during handling.
- Celery stalks, 3, cut into 3-inch batons: Celery that's been chilled stays snappier. Three inches is the perfect length—long enough to grab, short enough to fit in someone's mouth in one bite.
- Carrots, 3 medium, peeled and cut into 3-inch batons: Raw carrots are sweet and their natural color is unbeatable. Cut them uniform so they look intentional, not haphazard.
- Mixed olives, 1 cup, whole and pitted: The mix of green and black gives you color variation. Pitted means people can grab them without the pit anxiety.
- Dill pickle spears, 1 cup: Pickle juice is your secret flavor enhancer. The acidity wakes up everything around it and provides a bracing contrast to rich meats and cheeses.
- Roasted mixed nuts, 1 cup: Roasted, not raw—the heat brings out oils and deepens flavor. Mixed means every handful surprises you with something different.
- Kettle-cooked potato chips, 1 cup: Kettle-cooked means they're thicker and less likely to shatter under their own weight. They taste better and look more substantial than regular chips.
- Pickled jalapeños, ½ cup, drained: Drained is critical—excess liquid will create sogginess around the board. They provide heat and color in small bursts.
- Pepperoncini, ½ cup: These Italian pickled peppers are milder than jalapeños but bring serious vinegar tang. They're your sophisticated cousin of the hot pepper world.
- Fresh parsley sprigs: The vivid green is your finishing touch. Fresh herbs make boards look alive and intentional, not assembled from pantry debris.
Tired of Takeout? 🥡
Get 10 meals you can make faster than delivery arrives. Seriously.
One email. No spam. Unsubscribe anytime.
Instructions
- Start with a clean, dry foundation:
- Grab your largest wooden board—at least 18 by 24 inches because this is going to be substantial, and you need room to work. Wipe it down with a damp cloth like you're preparing for surgery. Dry it completely. A wet board is your enemy here because moisture makes things slide, and we're building a structure, not a slip-n-slide.
- Position your dip bowls like you're planning a city:
- Picture a diamond pattern—one bowl at twelve o'clock, one at three, one at six, one at nine. This creates natural zones that will guide where everything else goes. Keep them at least two inches apart because you're going to be stacking things between them, and they need breathing room. These bowls are your anchors, your landmarks, your entire reference system.
- Build your protein architecture:
- Fold and roll each meat slice deliberately. You're not just placing them—you're creating height and stability. Layer them in bands that radiate outward from your dip bowls like spokes. Alternate colors: turkey next to ham next to salami next to beef. Go at least two to three slices high in each stack. Press down gently so everything compacts without crushing. Imagine you're stacking books, not crushing flowers.
- Stand your cheese like you mean it:
- Take those cheese batons and lean some against the meat stacks, stand some straight up like little towers, rest some against the dip bowls for stability. Alternate sharp cheddar with Swiss with pepper jack so your eye travels naturally through the board. The upright batons are your visual drama—they catch light and create shadow, which makes the whole thing look professional and intentional.
- Shingle your bread like you're roofing a house:
- Baguette slices go around the edges, overlapping slightly like roof tiles. This creates a visual frame and protects everything inside from sliding around. Crackers and pretzel crisps get stacked in generous piles—similar shapes together for visual rhythm. Think about it like you're creating little bread dunes that will support the other elements. Nothing sparse, nothing crowded—something generous that looks abundant.
- Create vegetable bundles with intention:
- Group your carrot batons together standing upright like a little forest. Celery sticks next to them. Cucumber rounds in their own cluster. You're creating distinct zones so people know where things are and it all looks organized instead of chaotic. Cherry tomatoes go in small clusters scattered around—little red exclamation points. Bell pepper strips drape along the sides like they're meant to be grabbed last, which they are.
- Fill gaps with texture and crunch:
- Corner spaces get your roasted nuts. Open areas between protein stacks get your potato chips in small piles. Pickled jalapeños and pepperoncini in little mounds near the dips because they're condiments first, snacks second. Every gap should feel intentional, never like you're just shoving things in where they fit.
- Finish with green and confidence:
- Tuck parsley sprigs into open spaces where they catch the eye—you want green touching different zones of the board so the whole thing feels finished and alive. Now gently nudge the board. Everything should feel solid, stable, confident. If something topples, you've got a problem to fix now. Finally, wipe the edge of the board clean with a damp cloth. You're not just feeding people—you're showing them something special.
 Pin
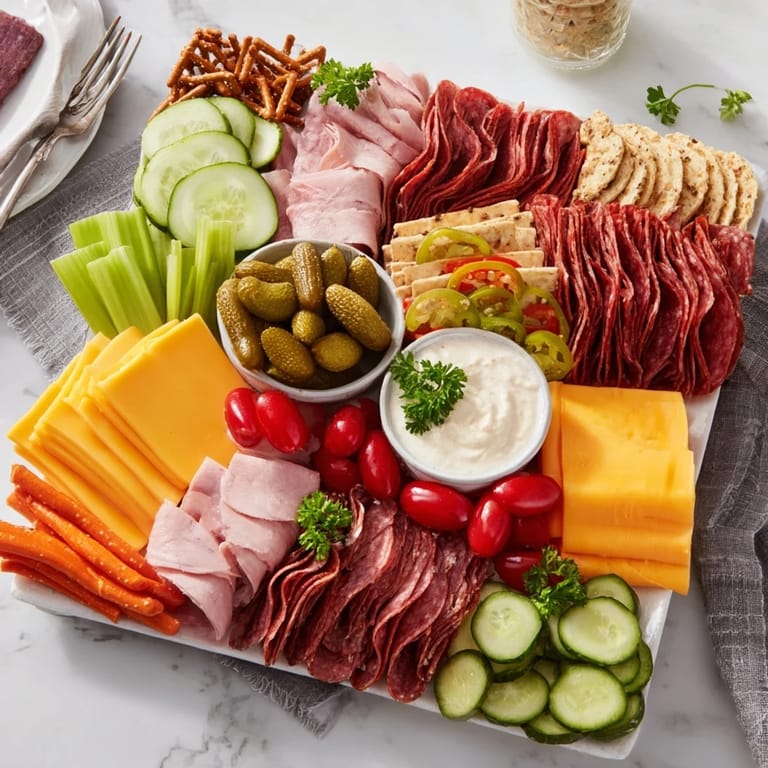
Pin There was this moment at a birthday party where my seven-year-old nephew looked at this board and actually said, "This is beautiful." Not, "I'm hungry," but that he noticed the architecture, the colors, the intentionality. That's when I realized this wasn't about feeding people efficiently—it was about making them feel like they mattered enough for you to build something thoughtful.
The Art of Strategic Placement
The difference between a good board and a legendary board is understanding sight lines and reach zones. People eat with their eyes first, so every color should contrast with its neighbors—don't put red peppers next to ham. Every height variation should feel natural, not accidental. The tallest elements should be near the center where light hits them best and people can actually see them. The dips should be accessible without someone having to reach across a meat mountain. You're not just arranging food—you're choreographing how people will interact with it, and that takes real thought.
Stability Under Pressure
This board will travel. It will be lifted into trucks, driven over bumpy roads, carried up bleachers, and set down on less-than-level surfaces. Every element needs to support the others and be supported by them. Meats form your base because they're heavy and anchor everything above. Cheeses lean into meats and dips for stability. Breads and crackers nestle into gaps and prevent rolling. Vegetables stand upright in bundles instead of sprawling loose. It's physics and respect for gravity—understand how weight distributes and you'll have a board that survives the journey intact.
Temperature Management and Timeline
The window between leaving your house and serving this board is when things go sideways. Meats and cheeses start sweating in warmth. Vegetables wilt if they're exposed too long. Guacamole oxidizes. Dips get soupy. Crackers get soft. Your plan should be: assemble at home if you have only thirty minutes of travel time, or assemble on-site if it's longer. If you must assemble early, cover the entire board tightly with plastic wrap—and I mean tightly, like you're sealing a time capsule—and refrigerate. This holds things together for about four hours maximum. Beyond that, things start to deteriorate and you're eating regret.
- Add chips and crackers no more than fifteen minutes before people arrive, because even the sturdiest crackers surrender to humidity after that
- If guacamole oxidizes and turns brown on top, just scoop that layer off and the green underneath is still perfect—don't toss the whole thing
- Never leave this board at room temperature longer than two hours, period. Food safety matters, and nobody wants food poisoning as their tailgate memory
 Pin
Pin This board has become my signature move—the thing people expect to see, the thing someone always asks to photograph, the thing that somehow lasts the entire event without getting ransacked in the first twenty minutes. Build it with intention and you'll feed people something they remember.
Recipe Questions
- → What meats work best for the power stack?
Smoked turkey, black forest ham, peppered salami, and roast beef are ideal for layering due to their firm texture and bold flavors.
- → How should cheeses be prepared for stacking?
Cut cheeses into thick batons and alternate types to add height and color contrast while ensuring they remain stable and firm.
- → What breads and crackers complement the layers?
Sliced baguette, multigrain crackers, and pretzel crisps provide sturdy, textured layers that support the meats and cheeses.
- → Which fresh produce adds the best crunch and color?
Cherry tomatoes, cucumber rounds, bell pepper strips, celery, carrots, olives, and pickle spears contribute bright color and crisp texture.
- → How can the stack maintain stability during transport?
Use thick slices, fold or roll meats, stack firmly, and bundle vegetables upright to prevent shifting. Assemble close to serving time and chill dips well.
- → Are there suggestions for variations?
Vegetarian meats, lactose-free cheeses, and additions like roasted vegetables or seasonal fruits can be used to customize the board.