 Pin
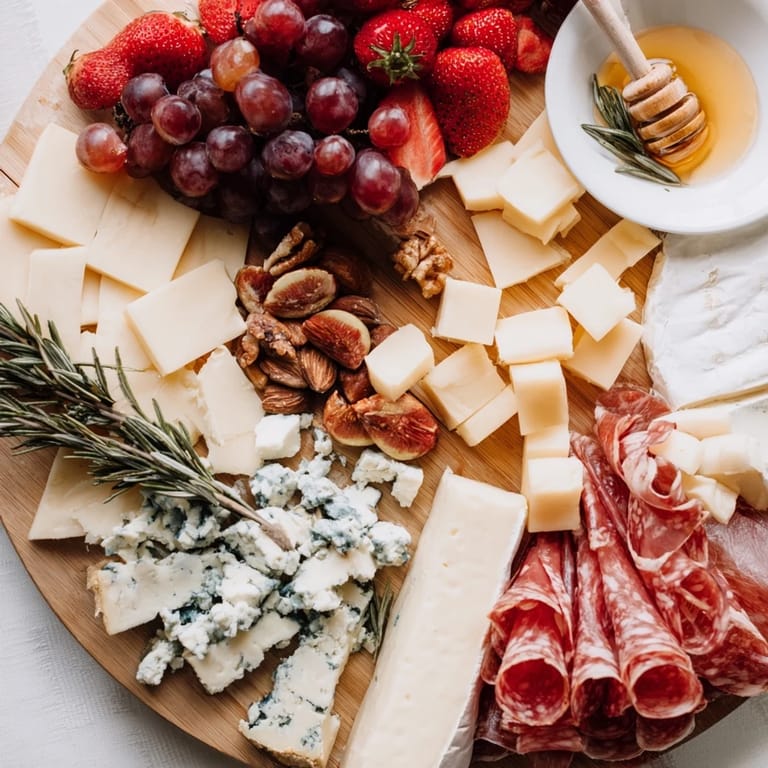
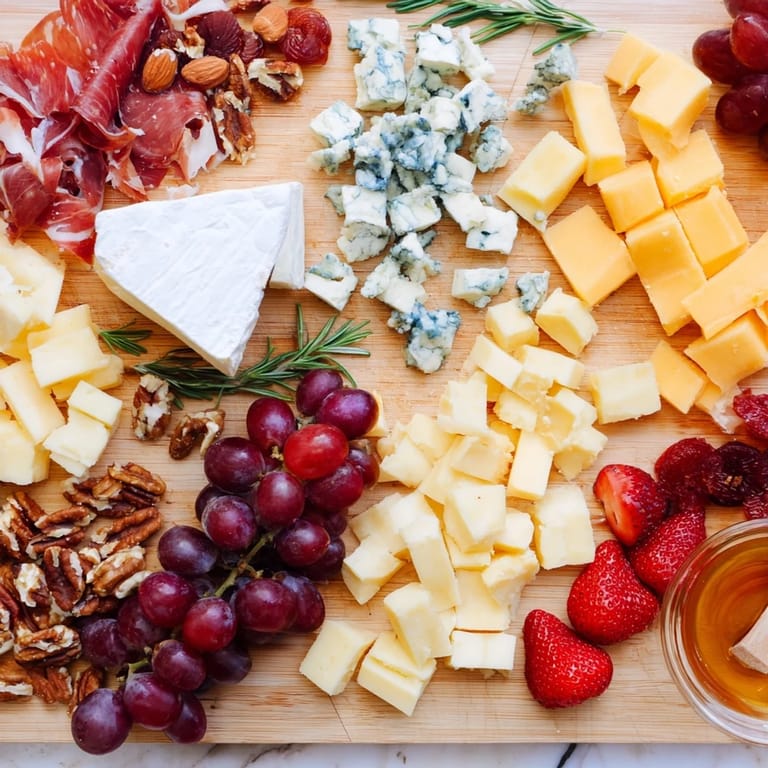
Pin The first time I arranged a grazing board that actually worked was when a friend casually mentioned she'd love something "dramatic" for her dinner party. I found myself standing in front of a cutting board at midnight, suddenly inspired to let things spill over the edge intentionally instead of fighting to keep everything contained. There's something about that controlled chaos—the way a slice of prosciutto folds naturally over the lip of the board, how a few almonds scatter across the table below—that transforms what could be just another cheese platter into something guests actually gasp at when they walk in.
I remember setting one of these up for my partner's work crew, and watching their faces when they realized some of the "mess" was intentional was absolutely worth the extra five minutes of arranging. One person reached for a piece of blue cheese that had tumbled onto the table and said, "Wait, is this part of it?" and suddenly everyone was diving in with more enthusiasm than they'd shown for actual plated food. That's when I knew I'd cracked the code—people eat with their eyes first, and a little beautiful chaos makes them hungry in a way perfection never does.
Ingredients
- Brie, sliced (150 g): The creamy anchor that starts your waterfall; slice it the morning of so the edges stay clean but the interior stays soft enough to look elegant.
- Aged Cheddar, cubed (150 g): Its firmness means it holds its shape as it spills over, and the golden color adds real visual drama.
- Blue cheese, crumbled (100 g): Use a really good one because people will notice; the veining naturally looks artful when scattered.
- Goat cheese, sliced (100 g): Its tang cuts through richness and looks pristine white against darker cheeses.
- Prosciutto (100 g): Buy it sliced fresh from the counter if you can; it folds like silk and drapes beautifully.
- Salami, sliced (100 g): Choose one with good marbling so each slice looks intentional, not just meat.
- Red grapes, small clusters (1 cup): Keep them in small groups so they cascade naturally without rolling everywhere.
- Strawberries, halved (1 cup): Slice them just before serving so they don't weep into everything.
- Blueberries (1/2 cup): These are your visual jewels; they catch light and roll dramatically off the edge.
- Pear, thinly sliced (1): A mandoline is your friend here; toss the slices in a tiny bit of lemon juice immediately to prevent browning.
- Dried apricots (1/2 cup): Their warm color bridges the gap between cheeses and fresh fruit beautifully.
- Dried figs, halved (1/2 cup): Break them in half by hand so they look rustic, not pre-packaged.
- Almonds (1/3 cup): Toast them lightly if you have time; the aroma actually makes people hungrier.
- Walnuts (1/3 cup): Their irregular shapes add visual texture and feel more generous scattered about.
- Baguette, sliced and toasted (1): Slice it thin and toast it right before assembly so it's still warm and crisp.
- Assorted crackers (150 g): Pick 2–3 varieties in different shapes and colors so the board doesn't feel monotonous.
- Honey (1/4 cup): Pour it into a small ramekin, but drizzle a little along the board's edge for that cascading effect.
- Fig jam (1/4 cup): Use a really good one; it's worth the splurge and makes people ask for the brand.
- Mixed olives (1/4 cup): Include both green and dark if you can; scatter some off the edge for visual continuity.
- Fresh herbs, rosemary and thyme: Strip them from the stems and tuck them in gaps; they add fragrance and fill visual holes.
Tired of Takeout? 🥡
Get 10 meals you can make faster than delivery arrives. Seriously.
One email. No spam. Unsubscribe anytime.
Instructions
- Set your stage:
- Position your board so part of it genuinely hangs over the table's edge, leaving several inches of overhang so ingredients have somewhere intentional to go. If you're nervous, use a marble or wood board that won't slide; weight matters.
- Anchor with cheese:
- Arrange your four cheeses in overlapping slices and chunks near the edge, with at least a few pieces deliberately crossing the boundary onto the table below. Think of it like the board is tilting gently toward your guests.
- Drape the meat:
- Fold prosciutto and salami in gentle waves right beside and over the cheese, letting them fall naturally like silk. Don't make it too neat; the folds are where the drama lives.
- Cascade the fresh fruit:
- Nestle grapes in small clusters, position strawberry halves flat-side-up so they catch light, and let some blueberries roll gently off onto the table. Pear slices should overlap like roof tiles, some on the board and some trailing down.
- Scatter the textures:
- Tuck dried apricots and figs into gaps, and sprinkle almonds and walnuts both on the board and on the table below as if they've tumbled down. Uneven distribution actually looks better here.
- Position your crackers and bread:
- Stand some crackers vertically like they're leaning against an invisible wall, lay others flat, and lean a few toast slices as if they're mid-fall. This three-dimensional approach is what makes the whole thing feel dynamic.
- Add the condiments:
- Place small ramekins of honey and fig jam on the board, then drizzle a thin line of honey toward the edge and scatter a few olives along the same path. This visual connection ties the fallen elements together.
- Finish with greenery:
- Tuck fresh rosemary sprigs and thyme between ingredients, especially in any visible gaps. The herbs add color and fragrance that makes people lean in.
- Serve with intention:
- Bring the board to the table with a bit of ceremony and tell guests they can grab from both the board and the table—the permission to take the "fallen" elements makes the whole concept click.
 Pin
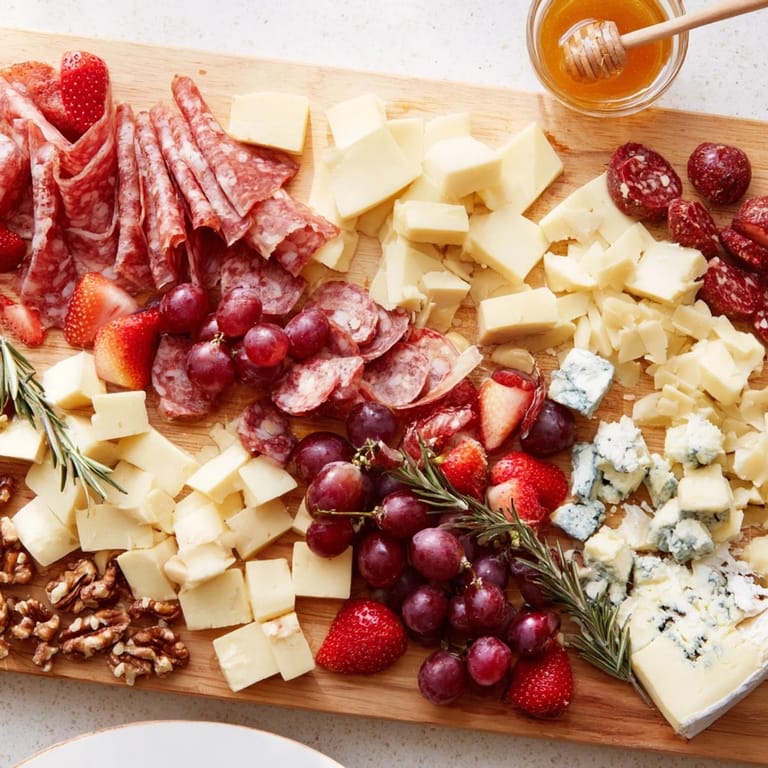
Pin What I didn't expect was how this simple idea would become the thing people actually remember about the meal. My neighbor still talks about that grazing board, not the main course I spent three hours on. That taught me something: sometimes the most memorable moments come from playfulness and permission—the permission to let things look a little wild, the permission for food to be fun before it's perfect.
The Magic of Height and Movement
A flat board is fine, but the magic happens when you add dimension. I learned this by accident when I stacked cheese too high on one end and instead of looking sloppy, it looked deliberate and inviting. The eye actually follows the cascade, and suddenly every ingredient feels important. Now I intentionally build the board with one tall side and one low side, using the height to guide people's hands and eyes toward the best bites. It's the same ingredients, but the arrangement makes it feel like there's a story about where things come from and how they belong together.
Why Vegetarian Guests Actually Shine on This Board
I realized early on that by skipping the meats and doubling down on cheeses, nuts, and fruits, you don't end up with a board that feels like something's missing—you end up with something even better. The vegetarian version actually has more visual variety because there's more room for color. Add some white cheddar, layer in dark figs and golden apricots, and suddenly the board tells a more interesting story. Your vegetarian guests get to feel like the board was designed for them, not like an afterthought, and honestly, everyone ends up eating the same thing anyway.
Timing, Temperature, and the Art of Last-Minute Assembly
I used to make these hours ahead, and they always looked a little tired by the time guests arrived. Now I do all my prep work early—slice everything, arrange it on the board—but I keep it all in the fridge until thirty minutes before people arrive. Then I do a final assembly that takes maybe fifteen minutes: refresh any cheese that's gotten sweaty, add fresh herbs, position the cascading elements, and pour the honey. The board hits the table looking crisp and intentional, not like it's been sitting around. There's also something satisfying about the ritual of finishing it together with whoever's helping in the kitchen; it builds anticipation.
- Keep everything in separate containers in the fridge until assembly time, even the board itself if you have room.
- Slice your fresh fruit and drizzle pears with lemon juice right before the final assembly.
- Bring soft cheeses out of the fridge five minutes before arranging so they're cold enough to hold their shape but warm enough to look creamy and appetizing.
 Pin
Pin This board has become my secret weapon for looking thoughtful without fussing, and it works every single time. Whether you're hosting a fancy dinner or just gathering friends on a random Tuesday, it reminds people that beautiful things don't have to be complicated—they just have to be made with a little intention and a willingness to let things fall where they want to.
Recipe Questions
- → How do I create the waterfall effect?
Layer ingredients starting near the board edge and let some pieces spill onto the table, creating a cascading look that mimics a waterfall.
- → Can this board be adapted for vegetarians?
Yes, omit cured meats and use plant-based cheese alternatives to keep it vegetarian-friendly without losing flavor.
- → What types of accompaniments pair well with this arrangement?
Honey, fig jam, mixed olives, and fresh herbs add complementary flavors and aromas to balance the richness of cheeses and nuts.
- → How should I prepare the board surface?
Use a large wooden or marble board and set parchment or butcher paper underneath to catch fallen ingredients for easy cleanup.
- → What nuts and fruits enhance this display?
Dried apricots, figs, almonds, walnuts, strawberries, grapes, blueberries, and pears are excellent for varied textures and colors.