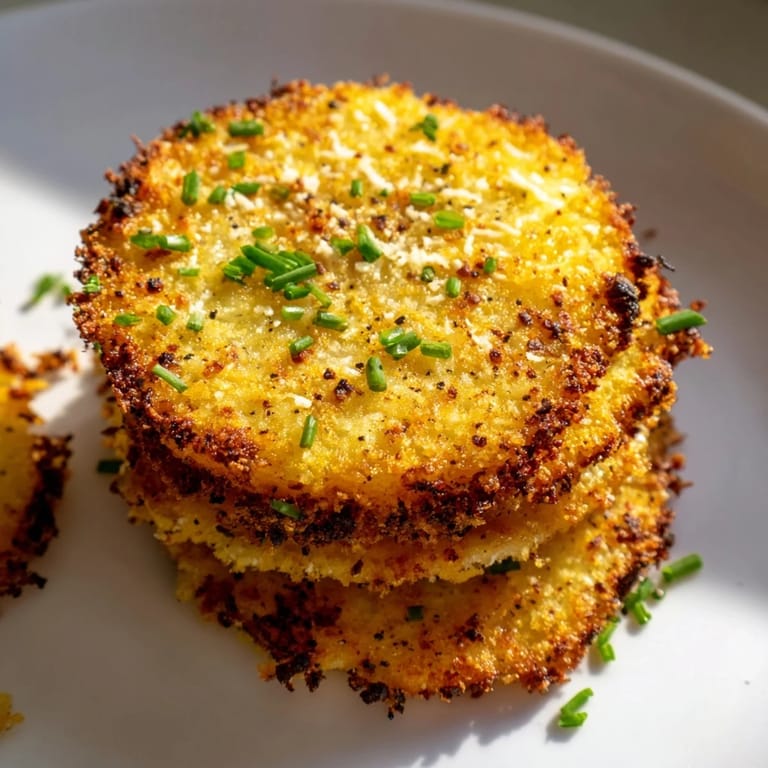
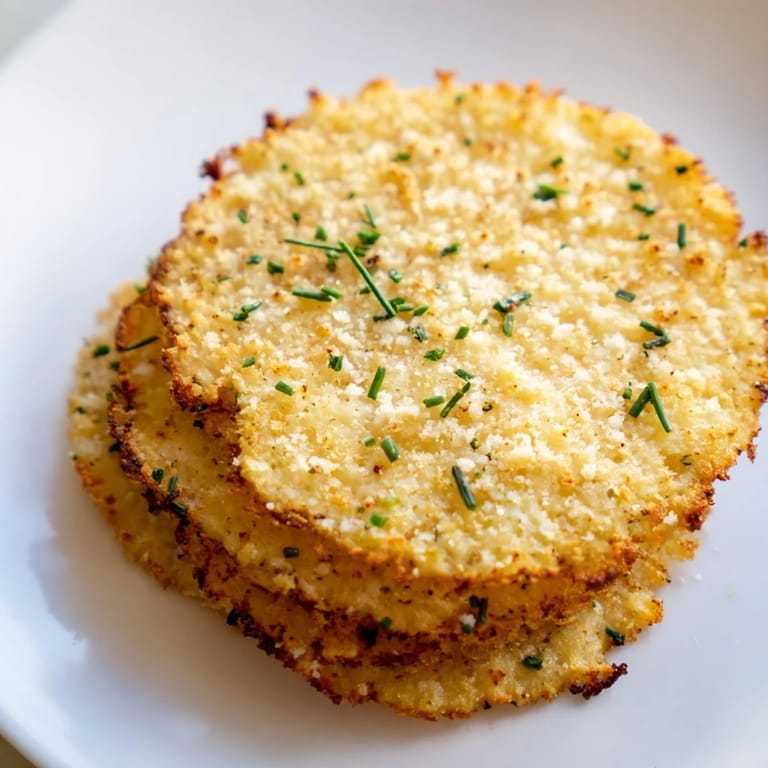
 Pin
Pin I discovered these by accident while cleaning out my fridge one weeknight, staring at a container of cottage cheese that was about to expire. Instead of tossing it, I wondered what would happen if I baked it like a crispy cracker, and honestly, the result shocked me—golden, crunchy, and somehow addictive in a way that made me question why this isn't already everywhere. Now they're my go-to when I want something that feels indulgent but actually delivers serious protein without the guilt.
My friend Sarah came over complaining about how hungry she always felt by 3 PM, and I handed her a few of these warm from the oven with a smug little smile. She ate half the batch without saying a word, then asked if I could just make them on rotation because she wanted them in her lunch rotation every single week. That's when I knew I'd stumbled onto something genuinely useful.
Ingredients
- Cottage cheese: The star that nobody expected—full-fat or low-fat both work, but small curd varieties hold together better and bake up with better texture than chunky versions.
- Garlic powder: This is where the savory magic happens; don't skip it or substitute fresh garlic, which adds moisture.
- Onion powder: Rounds out the flavor without adding water like fresh onion would.
- Smoked paprika: Optional but worth it for that subtle depth that makes people ask what the secret ingredient is.
- Black pepper and salt: Freshly ground pepper makes a real difference here—it tastes sharper and livelier than pre-ground.
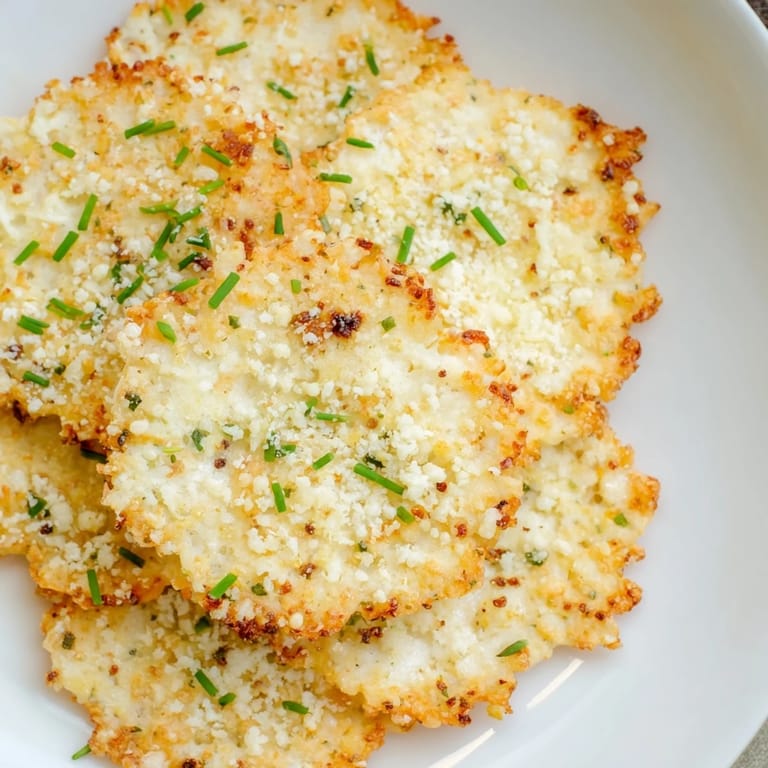
- Chives and Parmesan: These optional toppers add visual appeal and an extra layer of flavor right before baking.
Tired of Takeout? 🥡
Get 10 meals you can make faster than delivery arrives. Seriously.
One email. No spam. Unsubscribe anytime.
Instructions
- Drain and dry your cottage cheese:
- Line a fine-mesh sieve with a coffee filter or cheesecloth, dump in your cottage cheese, and let gravity do the work for a minute. Then press gently with paper towels—this step is what separates chips from disappointing soggy clouds.
- Mix your seasoning blend:
- Combine your drained cottage cheese with garlic powder, onion powder, paprika, pepper, and salt in a bowl and stir until it's evenly coated and looks like a slightly chunky paste.
- Portion onto your baking sheet:
- Spoon tablespoon-sized mounds onto parchment paper, leaving about 2 inches between each one. Gently flatten with the back of your spoon into thin, even circles—the flatter they are, the crispier they'll get.
- Top and bake:
- Sprinkle with chives or Parmesan if you're feeling fancy, then slide into a 350°F oven for 30 to 35 minutes until the edges are golden brown and they look set. They'll continue crisping as they cool, so don't panic if they seem slightly soft when hot.
- Cool completely before eating:
- This is where patience actually pays off—leaving them on the pan to cool means they firm up into that satisfying crunch you're after. Once they're room temperature, peel them off and serve, or store in an airtight container for up to two days.
 Pin
Pin My partner walked into the kitchen mid-bake and said the smell reminded him of his mom's old cheese straws, and suddenly these chips became a way to recreate that nostalgic comfort without the butter and flour. Funny how a happy accident in the kitchen can turn into something that connects you to someone else's memories.
Seasoning Swaps That Actually Work
Once you nail the basic recipe, the seasoning options expand wildly—I've done versions with chili powder and lime zest, another batch with everything bagel seasoning, and one experimental round with curry powder that my roommate still asks about. The key is keeping the ratios dry and measured so you don't add moisture, and never going lighter on the drained cottage cheese or heavier on seasonings.
Why These Beat Store-Bought Alternatives
Most packaged cheese crisps are either deep-fried (hello, oil), loaded with weird stabilizers, or thinned out so much you barely taste the cheese. These are literally four simple ingredients that you control, crisp up in your own oven, and taste like actual food instead of a chemistry experiment. Plus, at about 14 grams of protein per serving, they actually keep you full.
Storage, Serving, and Endless Possibilities
These chips are best enjoyed the day you make them when they're at peak crispiness, but they'll hold in an airtight container for two days before softening—if that happens, a quick 5-minute stint in a warm oven brings back the crunch. I serve them with Greek yogurt and herbs for dipping, or just eat them plain as a protein-packed afternoon snack, but they also work scattered over a salad or paired with hummus for something fancier.
- If your kitchen is humid, store them with a silica gel packet to keep them crispy longer.
- These freeze beautifully for up to a month, and reheating in the oven for 3 minutes restores the crunch perfectly.
- Scale the recipe up or down by multiplying the proportions—one baking sheet usually holds about 12 to 15 chips comfortably.
 Pin
Pin What started as a fridge-clearing experiment has turned into something I make whenever I want a snack that actually satisfies, and honestly, there's something wonderful about that. These chips prove that the best recipes often come from working with what you have and staying open to happy surprises.
Recipe Questions
- → How do I achieve the crispiest texture?
Thoroughly draining the cottage cheese to remove excess moisture and pressing the mounds thin before baking helps achieve maximum crispiness.
- → Can I add other seasonings?
Yes, spices like chili flakes or dried herbs can be added to customize the flavor profile of the chips.
- → What is the best way to serve these chips?
They pair well with dips such as Greek yogurt, salsa, or guacamole, enhancing their savory appeal.
- → How long do the chips stay fresh?
Store them in an airtight container for up to two days to maintain their crispness.
- → Are these chips suitable for special diets?
Yes, they are high-protein, gluten-free, and vegetarian-friendly, suitable for various dietary preferences.